
 When I first started working at the bike store I didn’t know wheel truing was even a thing. I thought once you put a wheel together it’s permanently true. The reason for thinking this way was probably the fact I had a great set of wheels back then and they were some of the most resistant wheels I’ve ever had. Stood true through pretty much everything.
First I had to learn some theoretical stuff about how to true a bike wheel. Wheel truing is quite easy to learn, but one of the most difficult bike mechanic skills to master. If you want to learn it properly you ought to start with some principles before you try and do it yourself.
Based on the experience I now have I’d like to start this article with some theoretical stuff before we get into the mechanics of it.
What is a true wheel?
A true wheel means the rim has no horizontal or vertical movements in regards to its rotational axis, or a surface it rotates on.
Why Wheel Truing Is Important?
A better question than “Why wheel truing is important?” is, “Why proper wheel truing is important?”. When a wheel is properly trued all the tension applied to it is evenly distributed on each spoke, and that makes a huge difference in durability and even performance.
The thing is, a wheel can be true but still have wrong and unequal tension on its spokes. I remember going through the process of wheel truing and everyone commended me for my excellent skill. Sounds like bragging, but what I’m trying to say is later on I realized I wasn’t good at it at all. I could true any wheel so it looks perfectly aligned, but I never paid enough attention to spoke tension. That same wheel would go out of alignment during the first few rides.
A good thing in all of this is, for just regular maintenance on your wheels, you don’t really need to know too much about spoke tension, you just need to tighten back the spokes that got loose in time. However, if you truly want to know how to make high-quality wheels and repair them, you must get a bit deeper knowledge and understanding of this process.
All in all, it’s really useful to know how to true a bike wheel as it can save you a lot of money. The more often you can check spoke tension and true the wheel, the more it will last.
- For wheels
- Self activated clamp
- Simultaneous control of height and side tolerance
- Alloy/steel
- Foldable Des
Prices pulled from the Amazon Product Advertising API on:
Product prices and availability are accurate as of the date/time indicated and are subject to change. Any price and availability information displayed on [relevant Amazon Site(s), as applicable] at the time of purchase will apply to the purchase of this product.
How Much Does It Cost to True A Bike Wheel?
I’ve been to a lot of places around the world and basic wheel straightening cost is always between $10 and $25. In my opinion, that can be considered cheap or expensive depending on the quality of truing.
If they just make the wheel straight that shouldn’t cost more than 15$ anywhere in the world. But that’s not a proper way of doing things and there is the key difference in regards to the price. I think the cost shouldn’t be the same for any wheel because it’s not worth investing the same amount of time and skill in different wheels.
If I wanted to true an expensive wheelset I would be happy to pay $50 or more per wheel to someone who will take good care of them and check all the spokes for proper tension.
Can Any Wheel Be Trued?
No, not every wheel can be trued. If the rim is bent it will keep wobbling even if all the spokes are properly tensioned.
However, for a quick solution, you can sometimes make it true but it won’t stay that way for long because the spoke tension will be completely wrong.
Otherwise, if a wheel is not damaged, it can be properly trued. The only difficulty you might encounter is that the tension is completely unbalanced, to begin with. In that case, I prefer to completely unscrew all the spoke nipples and start the tensioning process from the beginning.
Why Do Wheel Spokes Break?
Wheel spokes can break for a number of reasons. However, the tipping point is always improper tension, unless, we are talking about derailleur or chain ending up tangled in them.
By making sure the wheel is trued with proper tension, you are minimalizing the chances of breaking a spoke on a trail. And that’s quite an important thing if you ask me. Breaking spokes on a trail is one of the worst experiences as a mountain biker.
The most common factors that lead to that tipping point of breaking spokes are rust or other forms of oxidation. The damage they get from getting hit from time to time, usually by rocks on the trail, is no joke as well. Especially with riders who are into downhill or enduro.
I like to take brake rotors off from time to time and spray the spokes with some Muc Off Bike Protect to prevent any oxidation, especially on nipples. Nipples get stuck from oxidation and then it’s really hard to true the wheel without replacing them.
In case you have rim brakes, don’t spray the wheel directly. Instead, spray onto some rag or paper towel and then use it to apply Bike Protect onto spokes.
How to Replace Bike Spokes
Replacing a bike spoke is a pretty straight forward task. However, there are a few key things you need to pay attention to.
- There is a difference in spoke length from each side on the rear wheel. To accommodate the cassette on the right side, spokes have to be shorter in order to place the rim in the axle’s center.
- Some rims don’t have spoke holes on the outer tire side which makes spoke nipple replacement a bit tricky.
- You will have to remove the cassette to replace spokes on either side of the back wheel. Sometimes you will have to remove brake rotors as well. You can remove the cassette with Bike Cassette Removal Tool Set, and if you have a freewheel then you need a Parktool Freewheel Remover only. To remove rotors you either need Park Tool Torx Compatible Three Way Wrench for 6-bolt rotors, or Park Tool FR-5.2 Cassette Lockring Tool or BIKEHAND Bicycle Bike External Bottom Bracket Install Removal Tool depending on which type of lockring your wheels have.
- To replace spokes correctly you need to pay close attention to how the old ones are placed. If the spoke broke you can always check two places next to it on the same side of the wheel. Every second spoke has the same placement. Also, there are differences in each wheel. There can be 2, 3, or 4 spoke crossings, and usually, the last crossing (when looking towards the spoke nipple) is different from the first ones.
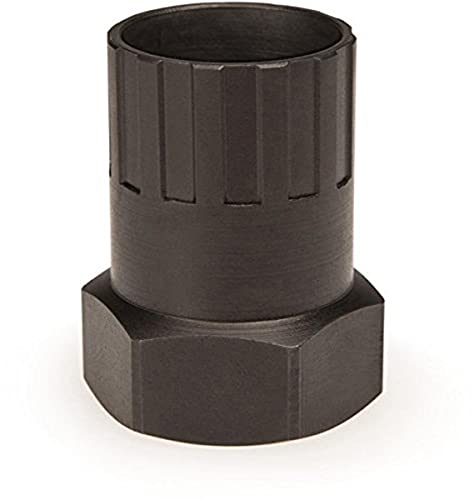
- Fits freewheels with 12-spline, 22.6mm tool fittings including Shimano, Sachs Aris, SunRace, DNP Epoch and other 5–10 speed freewheels
- Features enlarged 15mm pass-thru hole to accommodate 14mm solid axles
- Thin wall construction allows use without removal of cones and locknuts
- One inch hexagonal base fits wrench, socket or bench vise
- Heat treated alloy tool st
Prices pulled from the Amazon Product Advertising API on:
Product prices and availability are accurate as of the date/time indicated and are subject to change. Any price and availability information displayed on [relevant Amazon Site(s), as applicable] at the time of purchase will apply to the purchase of this product.
Minimal Necessary Equipment For Wheel Truing
Spoke Wrench
A spoke wrench is an essential tool for this job. You can get away with some improvisation to turn spoke nipples but you will likely damage them and give yourself more problems.
When it comes to choosing a spoke wrench, there are several options. Although most of them are overkill in terms of what’s necessary.
The cheap option – LETUSPORT Silver Road Mountain Bicycle Bike Spoke Wrench
It’s a decent spoke wrench which will do the job as good as any other. However, it’s lacking some small details that can speed up the process of wheel truing.
Optimal choice – Lumintrail Bike Spoke Wrench Spoke Tool 6 Size 8 Way
Several bucks more for a wrench that looks similar to the previous one? That’s right, and here is why.
Better spoke wrenches are thicker which makes them easier to turn when placed on the spoke. Another small detail that makes a huge difference is size numbers being displayed on both sides. This, in my experience, helps a lot because most of the time you are placing it from outside in direction to you. If the numbers are on the outside of the wrench only, you have to turn and check each time in order to use the properly sized hole.
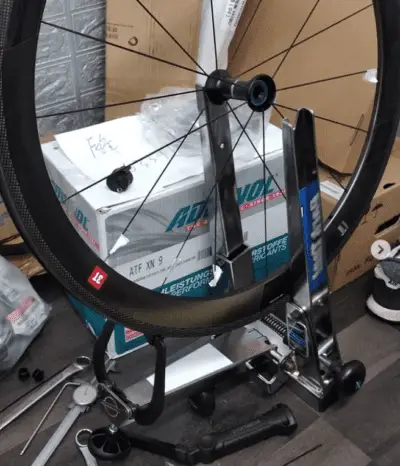
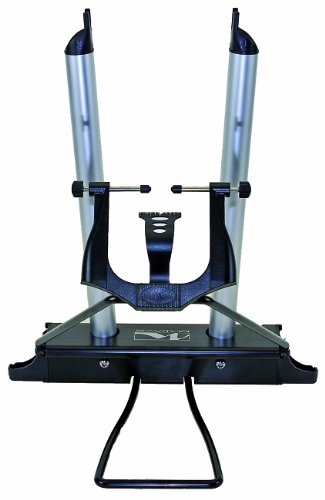
Wheel Truing Stand
M-Wave Foldable Wheel Truing Stand
Only one choice here because I used this wheel truing stand for years and it never failed me to do simple wheel truing jobs. I even used to put together whole wheelsets on this thing. It has its limits but only if you are trying to true wheels at a much higher professional level. In that case, you need something much better and more expensive which I will talk about in the professional equipment section of this article.
You might notice that there are many similar wheel truing stands in the same price bracket and they may seem like a good option but barely any of them are. I can’t say I tried them all but nonetheless a fair share of them went through my workshops. All I can say is that all of them had major flaws and couldn’t fit all the hub and wheel sizes.
Situational Tools
You need this tool only if you have aero spokes.
A Bladed spoke holder is used for holding aero spokes in place. The blade should be positioned in a rear-front direction for it to be aerodynamically effective.
You will see when adjusting aero spokes that they twist and lose their aerodynamic function. This can result in them breaking as well, and I would advise to hold them in place with a bladed spoke holder at all times. More so because they are mostly used in road wheels and are specifically made to be lightweight, therefore easy to break.
Professional Wheel Truing Equipment
Professional Wheel Truing Stand
First thing I noticed when I switched to a professional wheel truing stand is just how precise and advanced it was. On a basic wheel, truing stand you need to notice the wheel wobble by your eye or hear it scrape against the limiter. It is okay for most truing jobs, however, not good enough if you want perfectly straight wheels with good spoke tension.
Professional wheel truing stand should have mechanical gauges that show wheel wobbles with greater precision. Once you get used to it a bit, you realize just how much time it can save by having a reference point on the gauge instead of remembering positions on the wheel by counting spokes. (A complete explanation of reference points, and how to choose them, later on.)
When it comes to choosing the right professional wheel truing stand, Park Tool offers the best ones I’ve ever used. Park Tool’s mid-tier TS-2.2 Professional Wheel Truing Stand is amazing but a stock version doesn’t come with gauges and some important adaptors. When you add Park Tool Dial Indicator Gauge Set and Park Tool TS-2TA Thru Axle Adaptors it becomes a bit pricey. However, for those who don’t mind spending a few extra bucks, this is the best option out there.
Another decent choice on the market is NICE CHOOSE Wheel Truing Stand. It’s cheaper than Park Tool ones and comes stock with all the gauges, adaptors, and even a disc brake rotor gauge. Had the pleasure of using it several times and I am actually looking to buy it for myself soon as I’m not really satisfied with the one I have at the moment…
Spoke Tension Meter
Spoke tension, as I’ve already mentioned, is the key to a good wheel. Several years back there were only expensive ones, some used to cost more than the wheel truing stand itself. Then Park Tool made a different version of it, much simpler and affordable. Nowadays there are even cheaper knockoffs of that model as well. There is really no excuse not to use one.
I’m using Park Tool TM-1 Spoke Tension Meter just because I like to support a good company that is actually a part of the MTB community. An added bonus is that with this Spoke tension meter you get a spoke diameter gauge and a spoke tension chart to convert that diameter into required spoke tension.
However, if you want something cheaper because you will use it occasionally, there are some alternatives. For example, a friend of mine bought Feian Bicycle Spoke Tension Meter Measuring Tool which was the cheapest option at the time and I was actually surprised how good it worked.
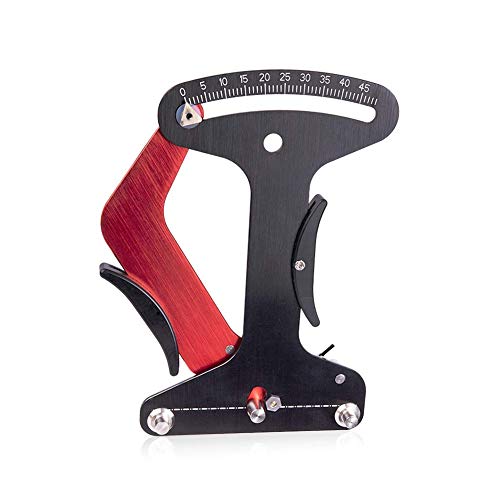
- High quality: The tensiometer is made of high-quality aluminum alloy material, which is strong and not easily deformed and durable.
- Easy to use: It has a simple design, can be used and operated, and measures the absolute tension of each spoke in the wheel
- Stable: This is a bicycle tiny bar tensiometer, suitable for round spokes and flat spokes
- Multi-purpose: used to build or repair wheels, diagnose wheel problems.
- The package includes: 1 x tensiometer to reliably measure the tension of all microscopic strips in the wheel and the relative tension of all repeating strips in the whe
Prices pulled from the Amazon Product Advertising API on:
Product prices and availability are accurate as of the date/time indicated and are subject to change. Any price and availability information displayed on [relevant Amazon Site(s), as applicable] at the time of purchase will apply to the purchase of this product.
How to Adjust Bike Spokes
A lot of you probably haven’t had the chance to try truing their own wheels. For that reason, I’m inclined to start with the basics when explaining the process of wheel truing.
Since I’ve already mentioned a few main principles about how the wheel and spokes function together, I will skip that part and move straight to “how to do’s”.
Which Side to Turn Spoke Nipples
Spokes and nipples are right-hand threaded.
I’m always seeing confusion though, mainly because the natural way you turn spoke nipples is on the “bottom” of the wheel. When it comes to spoke nipples you tighten them clockwise when looking on top of the wheel from above, for example using a screwdriver. That means if you are turning them on the bottom of the wheel while looking from above the thread is practically reversed. So when a wheel is in wheel truing stand, naturally you will turn spoke nipples counter-clockwise to tighten them with a spoke wrench.
May sound a bit complicated but really it’s simple. Once you try it yourself you won’t have any problems figuring it out.
Reference Point
A reference point is a point or an area of the rim for which you can say is aligned at the time. It’s used to determine which spokes to tighten and which not to touch.
In lateral wheel truing a reference point is always at the marker that marks the axle center, that’s where the rim should be once you are done. Unless you have some rare frame that has an offset in the rim to axle alignment but that requires a bit different rims as well.
Radial truing, on the other hand, requires constant checking for a reference point, especially on professional truing stands. There is no marker that tells you exactly where the rim should be, yet you need to figure it out on your own.
Why is a reference point checking important? Because it makes the process of truing quicker and more precise. And more importantly, you can avoid fixing your own mistakes of tightening some areas too much.
Lateral And Radial Wheel Truing
I like to call it vertical and sideways, even though lateral (sideways) and radial (vertical) are the proper geometrical terms.
As I mentioned in the beginning chapters of this article, wheels can go out of alignment and wobble sideways, or wobble up and down.
With experience everyone reaches a point at which they can true a wheel lateral and radial at the same time, however, I never suggest that for anyone that’s still new to wheel truing. Simply because it’s too much to account for at the same time for each and every nipple turn.
Lateral (sideways) wheel truing is the simpler one because all you need to do is find a spot where it goes out of alignment and tighten the spokes on the other side to kind of pull the rim back into place. You can achieve the same by releasing the tension on the same side where the wheel went out of alignment. However, beginners should stick to only tightening the spokes, because it requires a bit of deeper understanding of spoke tension to know when you can release spoke tension. Also because nipples/spokes won’t tighten by itself, they only lose tension.
One thing I tell anyone I teach wheel truing is if you can’t true radially and laterally at the same time it’s always better to first take care of radial alignment. The process of radial alignment itself requires you to make sure the spoke tension is pretty equal around the rim. When radially truing it’s important to equally tighten the same number of spokes on each side of the wheel. Otherwise, the wheel goes out of lateral alignment.
On cheaper wheel truing stands you always have a point which is the most out of alignment as a reference point. What I usually do is start tightening areas around those spots. If you are unable to reach radial alignment that way that means there is a point where spokes are too tight and you might need to release them a bit.
On professional wheel truing stands there is a spring operated gauge where you can choose a reference point in radial truing. It’s usually good to choose some point that’s in the middle when looking at how much the rim is protruding from the center of rotation. This will not always be the case, however, sometimes spokes will be a bit too loose and you will have an endless job of tightening them bit by a bit. That’s why spoke tension meter is a gamechanger. Believe me, when I say, only that is a reason good enough to invest in Feian Bicycle Spoke Tension Meter Measuring Tool and NICE CHOOSE Wheel Truing Stand.
A bit more detail about which spokes, how many spokes to tighten, and how much to tighten each of them, up next.
How Much to Tighten Each Spoke
After finding an area that is out of alignment, I start checking for loose spokes from the center in each direction. If you find one or more, first you need to return those to seemingly equal tension as those around it and proceed to align the rim from there.
To determine how much to tighten each spoke, first, you need to check the two spokes from each to each the wobble is happening. Depending on how much the rim is out of alignment in the center of that wobble it’s best to start with a 180°, or 90° turn with a spoke wrench. If the area out of alignment covers more than 4 spokes, I start tightening spokes in each direction from the center. However, not in the same amount. Every second spoke I cut it by half and the same in the other direction. That way if the area out of alignment is longer in length you can align the whole area at once. Even if you don’t manage to, this way you will make sure the spoke tension doesn’t differ too much from spoke to spoke.
The same technique is applied in lateral and radial truing.
A Wheel Should be Centered at All Times
When I say centered, I don’t mean true, instead, I mean in the center of the axle. Every wheel truing stand has a marker for it.
If you first make a wheel true and then you have to align it with the center of the axle, the wheel will start to wobble a bit 99% of the time. That’s not such a big deal and can be easily corrected most of the time, but it’s time-consuming nonetheless. Why not avoid it in the beginning.
The easiest way to make sure you end up at the center of the axle at all times is to always use that marker as a reference point in lateral truing.
Proper Spoke Tension
Spoke tension is where things become a little bit more complicated. At least it was like that for me, mainly because I didn’t have a spoke tension meter back then.
It gets complicated because there isn’t a standard for spoke tension, it’s different for each wheel. It always depends on the weakest link, which is, most of the time, a rim. This is the case if we are talking about maximum tension, however, not true for any rim. With carbon rims, you want to be extra careful about spoke tension, the specifications are usually lower and within a precise range.
Depending on the setup a spoke can be the weakest part. That’s why it’s always recommended to check both rim and spokes for tension specifications.
Luckily for us, rims are manufactured with some standards that closely follow how much tension can spokes intended for that rim take. That way, maximum spoke tension never differs too much between a spoke and a rim.
When determining proper spoke tension, I prefer to start with the spokes themselves. Simply makes things easier if the wheel is already set up form the factory or a local bike store. I can just check the actual spoke tension on the wheel and if the difference is minimal, I know I can fix it by not even checking the rim specifications. However, if your wheel is a bit more messed up with unequal spoke tension you might want to be thorough.
To get the actual number, first, you need to measure the diameter of the spokes. Spokes might be butted and have different diameters. In that case, you always measure the thinnest part because that will always be the weakest part.
Once you got your measurement, you can use a chart you get with Park Tool TM-1 Spoke Tension Meter, or you can use it directly from Park Tool’s website.
Once you have determined a proper spoke tension, you can start applying that to the wheel. The proper way to increase tension all around is to increase a quarter of a full turn on every spoke on one side then do the same on the other side. Repeating this whole process until you reach a proper spoke tension. On a bit more expensive rims, you might want to tighten 1/4 of a turn on every other spoke on one side, then do the same on the other side, come back to tighten spokes that you skipped on the first side, and lastly, do the same on the other side. This puts less stress on the rim, prevents it from getting small bends which are visible in spoke tension later on.
One thing you might notice is once you get equal tension around the wheel, it won’t be completely true. It would be too easy if it were.
Now you need to true the wheel by making small tension changes from spoke to spoke. In the end, you will have different spoke tensions on each spoke. It’s okay to have up to 20% difference and within that amount, it won’t affect the safety or quality of your wheel. Bigger differences mean the rim is in bad shape and has small bends from riding or simply is of low quality.
Most front wheels have equal spoke tension on both sides while rear wheels have it unequal. Rear wheels have to accommodate cassette on the right side so the flange of the hub is moved inward in regards to the rear axle. In terms of spoke tension, this means that the right side spokes will always have bigger tension than the left side spokes.
It’s not necessary to worry about left side tension too much, as long as you have proper spoke length and follow the proper spoke tension on the right side. The left side puts itself at proper tension once you get the rim in the center of the axle. The easiest way is to increase tension on both sides until you get near proper tension on the right side. Once you are close to it, tighten the right side, and release the tension on the left side bit by a bit until you achieve, both rim at the center and proper tension on the right. Others might have a different technique, but this is what always worked for me, and it made sure that I don’t damage the rim by having a huge margin in the tension between both sides.
Wheel Truing Tips And Tricks
Regular Spoke Adjustment
Some of my wheels are very old. I’ve ridden them for 12+ years. When you try to keep wheels in perfect shape for such periods of time, you learn some things about wheels.
What surprised me the most is how crucial is to regularly adjust spoke tension. Why? Because the first time it goes completely uneven it starts a process that can’t be reversed. After that, it will keep loosening and breaking spokes more and more often.
That’s a major benefit of having wheel truing stand at home. If you keep the balance in spoke tension at all times, the wheel can withstand tough riding for years and stay in perfect state. Unless, of course, you bang the rim somewhere.
Wheel Truing On The Trail / Road
When someone asks me how to true a wheel quickly on the trail, I tell them to stop giving me anxiety. That’s the word I would describe my mental state every time I mess my wheels up on the trail.
However, it’s not actually that difficult to do a quick fix on the trail, it’s more of ruining the ride. From that point on, all I’m thinking is not to mess the wheel up again and it tends to ruin the fun for me.
If you know what you are doing, you can easily get the wheel nearly true by only using a spoke wrench. The last part is a bit more tricky though because I wouldn’t advise riding on a nearly true rim. Especially on the trail, riding an untrue wheel can easily permanently damage the rim. You need to somehow make those small wobbles visible in order to fix them.
I like to turn my bike upside down, side of the trail preferably to avoid someone crashing into you. The easiest way is to find a stick or use a tire lever and tie it to the fork, or chainstay / seatstay for the rear wheel. Align it with the rim and you can proceed with wheel truing. It’s good to have some zip ties on you. They will keep it firmly in place which is important because the rim will scrape against the stick.
Try to true it as well as possible, with spoke tension in mind, to lessen the chances of permanent damage. Once you reach civilization, get that wheel checked in your local bike store, or you can do it yourself if you have a truing stand.
Round Off Spoke Nipples
In order to prevent rounded nipples from happening always try to use the correct size hole on the spoke wrench.
Sometimes it may be difficult as spokes can bend and increase a bit in size from material oxidation. If that’s the case you can use a bigger size to turn them. I try not to apply too much force on them until I’m sure that they will start to turn. If I’m worried about rounding them off, I will try two things. First, add just a small drop of Muc Off Mo-94, or some Chain Oil. Then try to fit the proper size hole on the spoke wrench by adding a bit of force.
If you already have a rounded off spoke nipple, the only thing to do is to remove the tire and rim tape and try to reach it with a screwdriver. Sometimes you won’t be able to because the spoke will protrude above the nipple. In that case, you have no option other than cutting the spoke and replacing both spoke and the nipple.

- MULTI-PURPOSE: Muc-Off MO-94 is the ultimate multi-purpose wonder spray that can be used in a multitude of ways to protect your bike or motorcycle. It’s also amazing for use around the house for sorting squeaky door hinges and freeing stiff bolts!
- EFFICIENT LUBRICATION: MO-94 is an effective lubricant that works to reduce friction and frees seized parts without breaking a sweat.
- LONG-LASTING PROTECTION: A generous coating of MO-94 will leave a long-lasting protective film that works between washes to help prevent dirt adhesion.
- ANTI-CORROSION: The spray drives out moisture from the deepest depths of your rig to help protect against corrosion and rust build-up.
- ECO-FRIENDLY: MO-94 is PTFE-free and fully biodegradable so it’s just as friendly on the environment as it is on your ri
Prices pulled from the Amazon Product Advertising API on:
Product prices and availability are accurate as of the date/time indicated and are subject to change. Any price and availability information displayed on [relevant Amazon Site(s), as applicable] at the time of purchase will apply to the purchase of this product.
Lateral And Radial Truing at The Same Time
Truing wheels laterally and radially at the same time can be a bit challenging for a beginner. Essentially, you need to have experience with exactly what result you get with each nipple turn because you are doing two actions which affect each other at the same time.
First of all, you need to master referencing. Reference points are a must with this type of truing, and that means two of them, one for radial and one for lateral, each time you twist a spoke nipple.
We used to have contests like wheel truing challenges at work, trying to get wheel true with the least possible spoke nipple turns. It can really improve your analytical skill giving you the ability to know exactly which nipples to turn in order to fix and avoid several steps ahead.
I find it easier to focus on radial wheel truing and simply adapt the choice of spoke nipple to fix lateral at the same time. That, in my opinion, is as good an explanation as any, of how to do both radial and lateral wheel truing at once. No matter what I tried I always came back to that one rule. The only thing that improved is my ability to decide which spoke nipple to choose and how much to turn it.
Can I Ride With a Broken Spoke?
No. If you like your current wheel better avoid riding with a broken spoke unless you really have no other choice.
If I had to give a bit longer answer I would say it’s best to have extra spokes and tools with you. However, depending on the wheel, it might be too difficult to change spokes on the trail. If that’s the case, I would ride with a broken spoke but really carefully and straight to somewhere where I can get it fixed.
If you have no problem with buying a new wheel or changing lots of spokes in the near future, then go ahead and ride as much as you want while missing a spoke.