
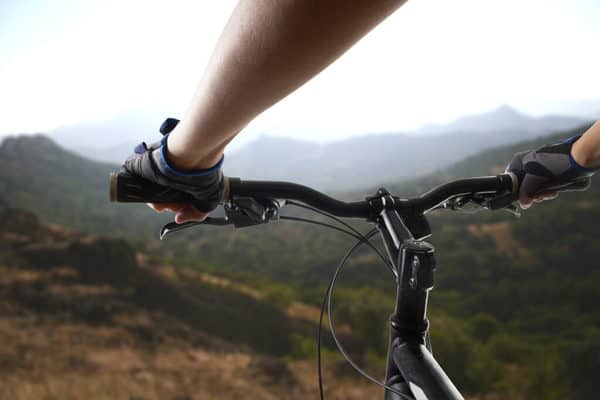
Whether or not you ride mountain bikes, road bikes, or any other type of bicycle, all cyclists know how fragile some parts of our bikes can become. When you’re riding a mountain bike down the trail or even a city street, it should be easy to feel if something is out of place.
Even though handlebar grips aren’t as fragile as some bike parts, they tend to be a weak point of an otherwise enjoyable ride. Regardless if they are brand new or old, bike handlebar grips tend to be prone to slipping.
But don’t worry, this is totally preventable and quite easy to remedy.
How to Keep Handlebar Grips from Slipping
Best ways to stop your handlebar grips from sliding are: cleaning all the surfaces, using glue or hairspray that will stick them into place, zip-tying them firmly to the handlebar, scraping the surface on the grip’s inside body to increase friction, or removing the problem altogether by upgrading to a pair of lock-on grips. It’s best to use the first two methods together; however, you will find that some work better than others.
It’s time to go into details about each method, where I will try to help you choose the way that will work best for you. And, more importantly, how to do it properly.
Different Handlebar Grips
The first step towards repairing anything on a bicycle is understanding it completely. There are so many different types of components for each purpose that you got to at least know which one you have on your bike and how it works.
It’s the same thing with handlebar grips, they aren’t complicated, but there are different types. More precisely, of how they lock onto the handlebar.
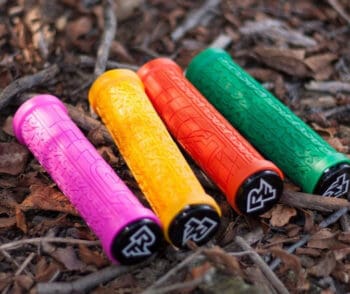
There are two different types of handlebar grips. One type is slide-on grips, and the other is lock-on grips.
The ones that are usually problematic are slide-on grips.
Slide-on Grips
Slide-on grips are the most common ones out there. You can also find them by the push-on grips, as some people call them.
I wouldn’t claim they are the most popular, though. They are mostly cheaper, so they usually come as standard on bikes from the factory unless we are talking about some higher-end bikes, which sometimes give you some super good slide-ons like ESI Chunky grips.
They are usually made from rubber or silicone sponge material.
They hold onto the handlebar by their own tension. That makes them a bit difficult to install, as they need to stretch a bit for that.
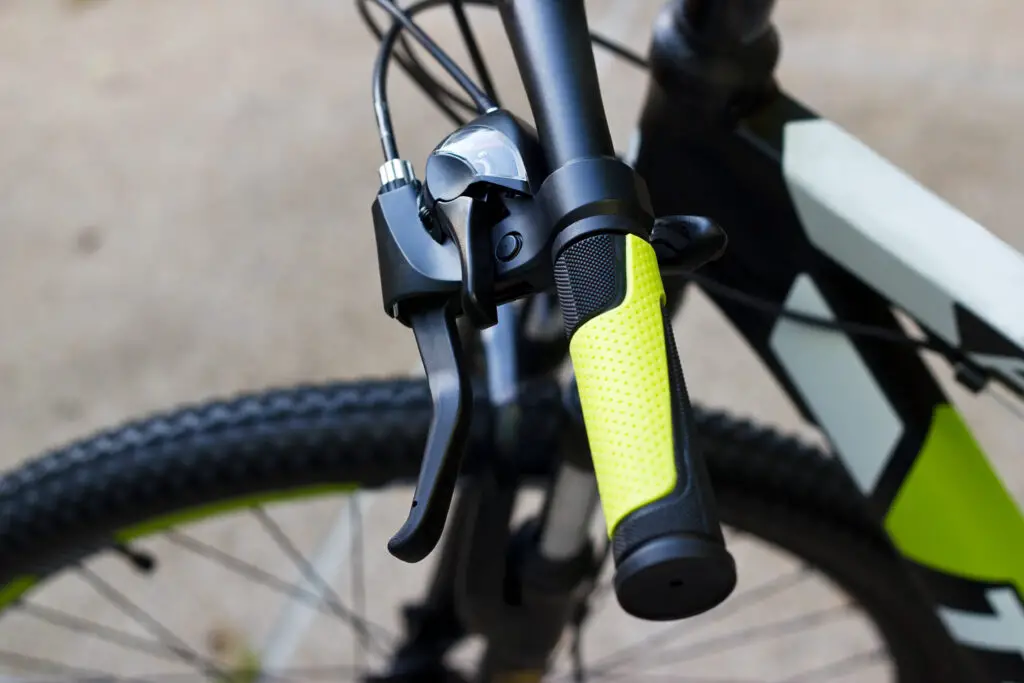
Lock-on Grips
Lock-on grips are quite secure. They are composed of two parts, a plastic core and a grip surface usually made of fine-textured rubber. The plastic core locks onto the handlebar with one or two screws. The screw grips enough that it prevents it from slipping. If it slips anyway, then something is wrong with it.
Why Do Handlebar Grips Start Slipping?
There are a lot of reasons why handlebar grips start slipping. Most of these relate to slide-on grips. Once you find out what the problem is, you can prevent it in the future or simply repair it repeatedly.
Now that you learn how different handlebar grips work, you can quickly diagnose the problem yourself. But since I’ve seen it all, I will tell you everything that causes it.
Water
Most handlebar grips work flawlessly in wet conditions, at least the quality and expensive ones. However, there are always some black sheep on the market. Once they get wet in the rain, they start twisting. Not every material is equally adhesive to the handlebar, and even some materials like rubber tend to have way different properties from different manufacturers.
Muddy conditions
If you ever fall from your bike and a handlebar lands in the mud, it’s a must to clean them. If any of the muddy dirt gets stuck between the handlebar and grips, it slowly grinds that surface. It’s mostly sand-like particles that are especially bad for carbon handlebars. Sooner or later, not only will your grips start to twist and slide, but that movement will cause damage.
Grease
Grease under handlebar grips is probably the worst thing you can have. It will get rid of the ability of your grips to stick into place completely. It’s easy to get it somewhere you don’t want while repairing your bike. Some people even make the mistake of using greasy products to install slide-on grips. They are sometimes challenging to install.
Old Grips
Yes, grips can start sliding if they are too old. Especially rubber gets stiffer as it ages and turns into plastic-like material with minimal adhesive properties. It’s best to replace them if that is the case.
Damaged Grips
If you are using some tool to stretch them during installation, slide-on grips can get damaged. By damaged, I mean permanently stretched enough that they can’t hold firmly onto the handlebar surface.
Not Completely Inserted
This can be a problem for both slide-on and lock-on grips. If you don’t insert them completely, they won’t hold on for long. This happens when changing to longer grips and not realizing you need to move the brake and shift the lever to make space for the longer grips. Not only that they will slide, but you can break the ends that are plush since there is no handlebar there to support them.
Not Completely Secured
Lock-on grips can slide if they are not completely secured with a bolt. Mostly because the bolt thread got worn out. They sometimes even come not tightened enough from the factory. I’ve seen it a lot on Trek bikes that come with lock-on grips.
How to Stop Handlebar Grips from Slipping or Twisting
You can stop your handlebar grips from slipping in 5 different ways. Not every choice will always work. It depends on what exactly is wrong with your handlebar grips.
Clean Handlebar and Grips
Your grips might be sliding on the handlebar because, as I already mentioned, the contact surfaces might be dirty or greasy. Cleaning them might just do the trick and stop handlebar grips from slipping. You need to clean both the handlebar and the grips from the inside because there is no point in cleaning only one contact surface. To clean them, it’s best to use a degreaser. Rubbing alcohol does the trick as well. After that, you can install them back, and you should be good to go.
Use an Adhesive to Stick Grips to the Handlebar
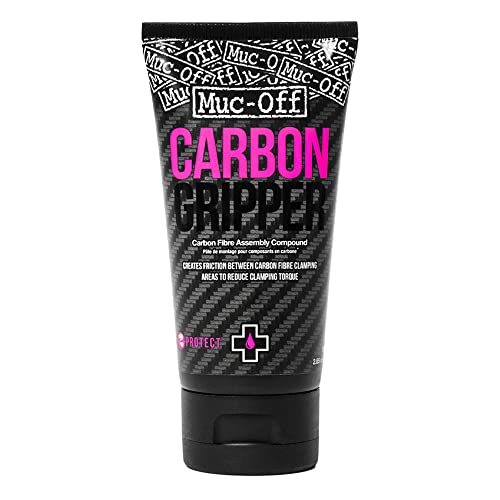
The adhesive should be used only if both the handlebar and grips are clean and still don’t hold in place. I prefer using something like a hair spray. When wet, it’s great because it makes the surface slippery so that you can install the grips easily. Then when it dries, it becomes sticky and locks the grips in place. You can use some other stuff, like carbon assembly paste-like Muc-Off Carbon Gripper. It gets good results if your grips are sliding only a bit.
Prices pulled from the Amazon Product Advertising API on:
Product prices and availability are accurate as of the date/time indicated and are subject to change. Any price and availability information displayed on [relevant Amazon Site(s), as applicable] at the time of purchase will apply to the purchase of this product.
Use Zip Ties on the Inside End
It looks a bit sloppy, but it works amazingly well. You can make a zip tie really tight next to the brake clamp, and it won’t be in the way of your hand. It holds perfectly on rubber slide-on grips, while the silicone sponge ones tend to get damaged over time.
Scrape Handlebar Grips Inside Surface
I use a metal pick to scrape that smooth surface on the inside. No matter if we are talking about slide-on or lock-on grips, it helps a lot. You won’t damage the grips by doing this unless you make deep cuts. By making only small scratches in the material, it will increase friction and prevent grips from moving. It’s a good option because it’s simple to do, and the damage isn’t visible once you install them back.
Invest in a Good Pair of Lock-on Handlebar Grips
This is by far the best solution to your problems. Lock-on grips are better in each and every way. They can always be tightened more if they ever start to twist. They are much more firm and stiff, so you can pull on them as hard as you want when riding rugged trails.
More importantly, they are usually better and of higher quality. By better, I mean the grip between your hands and them is better.
My all-time favorite ones are Ergon – GE1 Evo Factory Ergonomic Lock-on Bicycle Handlebar Grips. Most grips either give perfect grip or really good dampening, but these ones give both at the same time. Dampening might or might not be necessary for everyone, depending on how much vibration your hands can take. The best thing about them is they are somewhat ergonomic so that you can use them on any type of bike. However, the fact that they are only a bit ergonomically shaped with so many ridges makes them perfect for mountain biking nonetheless.

- ENDURO: Born in the Enduro World Series and built for the world’s fastest enduro / gravity riders. Specifically developed for wide riser handlebars and to support the correct upper body and arm position for total control on punishing terrain.
- ERGONOMIC SHAPE: Requires less gripping force from the rider while complex surface textures and specific rubber compounds deliver slip-proof adhesion, maximum damping and increased control with improved pressure distribution in the thumb area. Reduces or eliminates arm pump, hand pain and cramping on rough terrain and extended downhills.
- CUSTOM FIT: A low-profile aluminum clamp allows the grip angle to be adjusted for a custom fit. Can be easily readjusted as needed. Clamp eliminates twisting once tightened. (Carbon bar compatible).
- PURE MATERIALS: GE1 EVO grips are made from a super-soft GravityControl rubber compound. GE1 EVO Factory are made from Factory Custom Rubber which is super-soft and semi translucent. Rubber compounds are 100% German made and TÜV-certified. Anodized low-profile aluminum clamp.
- WARRANTY: Limited 2-Year warranty against defects in materials and workmans
Prices pulled from the Amazon Product Advertising API on:
Product prices and availability are accurate as of the date/time indicated and are subject to change. Any price and availability information displayed on [relevant Amazon Site(s), as applicable] at the time of purchase will apply to the purchase of this product.
My 2nd choice would be Lizard Skins Moab Lock-On Grip. Perfect grip, high quality, but a little less dampening properties.
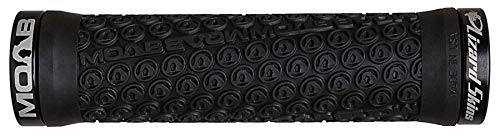
- MOAB inspired soft texture
- Small diameter
- Includes alloy coll
Prices pulled from the Amazon Product Advertising API on:
Product prices and availability are accurate as of the date/time indicated and are subject to change. Any price and availability information displayed on [relevant Amazon Site(s), as applicable] at the time of purchase will apply to the purchase of this product.
How to Prevent Handlebar Grips from Slipping in the Future
The main problem with producing handlebar grips is that manufacturers compete to offer the best grip and make their grips as comfortable as possible. As long as handlebar grips exist, they never really focused on making slide-on grips that don’t move. That’s what lock-on grips were made for.
I will give you a few tips on how to keep them working correctly in the future.
Proper Installation
Properly installing your handlebar grips is the key to having them work for a long time. Make sure there is no contamination with grease, dirt, or any liquid that won’t dry off, and leave a surface completely clean. Try to add an adhesive like hair spray the first time you install them. If you leave them greasy or dirty in time, they will start slipping.
Proper installation doesn’t only refer to the handlebar being clean and the grips being properly installed. It, in fact, depends on the position of your brake levers and shifters. If they are not in a good position, naturally, your hand will have the wrong placement on the grip, and it will start to slide after some time. I like my brake levers and shifters moved about a width of one finger away from the grips. You should try to move them left and right until you find the perfect position for you.
Conclusion
Riding around with your grips moving can be quite dangerous. To sum it up, you can prevent them from moving in several ways I mentioned in the article, but the best option is to get a pair of lock-on grips.
Keep shredding those trails!