
Costs add up when you have to take your bike to a local bike shop for every little repair. But actually, you don’t need to. There are plenty of simple repairs, and some of them can even be done without professional tools. One of the simplest repairs is performing changing a bike chain. Even if your bike chain doesn’t have a quick or a master link, it’s still doable without any tools.
Changing or repairing a bike chain is, in fact, much easier to do with proper tools like a chain breaker tool and master link pliers.

How to Change a Bike Chain: Removing a Master Link Without Master Link Pliers
Your chain probably has a master link connecting two ends. You can easily find it because it looks different from other chain links. Slowly turn the pedal backward to rotate the chain and inspect each link until you find it. If you can’t find a master link on your chain, skip this part and check the next part of the article below.
Connecting and disconnecting a master link is usually done with master link pliers, but this is how you can do it without them.
Most master links open the same way. There are two pieces, each with its own pin/rivet that locks onto the other part. The place where they lock together is a wider slot where the pin can easily go in the first gap. Then you need to squeeze or pull to lock the pins in the other part of that slot, which will lock the pin in place. Since both parts of the master link are the same, their being on different sides means both pins will snap into place simultaneously.
Disconnecting a Master Link Without Special Tools
Disconnecting a master link without master link pliers can be tricky because you have no choice but to use some sort of pliers. The best are needle-nose pliers to reach between chainplates and squeeze both chain links until the master link disconnects.
You can disconnect it with normal pliers as well, but it’s more difficult the smaller they are. Check which way each side of the master link needs to go in order to disconnect. Then angle the pliers so that you catch only plates of each side of the master link. You can use teeth on the pliers to get a good grip on each plate. If you placed them correctly, squeezing them will disconnect the master link.
Connecting a Master Link Without Special Tools
Connecting master links without master link pliers is probably the easiest thing to do. You don’t need any tool whatsoever. You can do this by connecting the master link on the drivetrain’s top side while the chain sits on both chainrings and the cassette. Once you put the master link in place, to connect it completely, just hold the brakes and step on the pedal. The tension created will snap the master link’s pins into place, and it’s connected. Just check that both ends of the master link rotate freely, which means it’s connected correctly.
If you can’t do it this way by any chance, you need something to squeeze both chain links. Some basic pliers, or even needle-nose ones, will do.
Using needle-nose pliers is better because they can reach between chainplates to press on the rollers. “Normal” pliers, however, can give you some challenges, but it’s doable. You need to angle them so that you can squeeze both protruding parts of both sides of the master link and carefully push rivets into sockets.
How to Change a Bike Chain: Removing a Chain Link Without Chain Breaker Tool
Before I go into this, I have to say that I don’t recommend disconnecting and connecting a chain this way. You should use this method only if you didn’t get your hands on a chain breaker tool.
Doing this won’t be easy. You will have to be really careful, and you will need a few things to get this done.
- A hammer
- A thin nail or something that can hit the chain pin without getting stuck on the chainplates. A 2mm hex wrench can be used as well.
- You will need something that can withstand a beating but has a hole in it for the pin to pass through. I prefer using a smaller nut or a piece of wood with a hole. Make sure it’s small enough so the chain won’t bend.

Disconnecting a Chain Link Without Special Tools
To start with, you need to put the rivet directly above the hole in whatever you are using, a nut, a wood piece, or something else.
Disconnecting the chain is more difficult this way because the chain will most likely be on the bike. You need to find a position in which you can pull the chain to a flat and sturdy surface, preferably the ground. Pulling the chain off the chainrings and cassette will help increase the slack you need.
Now, place the nail or whatever else you are going to use to push the pin out directly on the chain pin. Make sure it’s not a screwdriver or something that is only thin at the tip but then widens because once you push the pin a bit, the wide part will damage the outer chainplate.
Start to carefully tap the pin until it exits on the other side. Remember not to push it out completely; you want it to stay connected to the outer plate on the other side. Once you push it far enough, you can wiggle the chain until it disconnects.
How to Change a Bike Chain: Connecting a Chain Link Without Special Tools
In this case, connecting a chain back is more complicated than disconnecting it. For a chain link to work properly again, the chain pin must be in a precise position. Putting it back together with a hammer will require some time because hammers aren’t made for precision. Luckily, if you push the pin too far, you can always hit it from the other side to push it back and so on until you finally get it in the right place.
The bigger problem is that you can’t do this with any chain. Most of the chains these days have flush pins that can’t be reused. A flush pin can be recognized because on both ends, there is a hole in the middle of it, while the normal pin has a flat surface. Once pushed out, the small ring on one of the pin’s ends breaks, and it won’t hold the chainplate anymore. Those chains would quickly break during a ride if reconnected this way. Flush pins are usually found on chains from 9-speed and above and rarely on 8-speed chains.
In case you have a flush pin chain, you can disconnect it using this method, but then you need to remove both chain plates between the link you broke open and the one next to it. Then to connect it back, you need to put a master link in that place.
How to Properly Put a Chain Back on the Bike
It’s important that you put the chain back properly. Not all chains are that simple to reconnect.
Some chains have the direction in which they need to be on a drivetrain. You will notice them easily by having markings on one side and blank plates on the other.
Routing the chain back has its difficulties. For example, wrapping it around chainrings and cassette cogs is easy, but routing the chain through a rear derailleur can be confusing. The chain must go on the right side of the upper pulley sprocket and the lower pulley’s left side.
The rear derailleur will put a lot of tension on the chain, so you need something to hold both chains’ ends together while you connect them back. I like to use an old spoke cut on about 7″ in length, and both ends bent like two hooks. You can insert those hooks to hold the chain and derailleur tension while giving you enough slack on both chains’ ends to connect them easily.
Now, the only thing left to do is connect the chain back using one of the two methods I mentioned above. Make sure to choose the correct one for your chain type.
Is It Worth Buying Master Link Pliers?
Park Tool MLP-1.2 Bicycle Chain Master Link Pliers make attaching and detaching a master link much easier. In my opinion, they are a great tool to have if you are new to working on your bike.
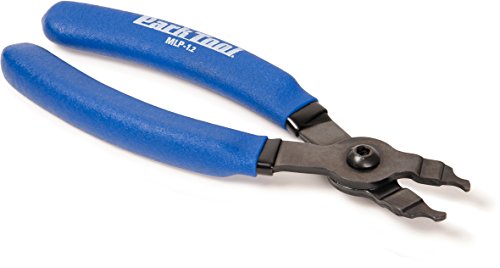
- An updated version of the original and best selling Park Master Link pliers
- Many non-Shimano derailleur chains use a master link that allows the chain to be installed and removed by hand
- While this type of master link doesnt require a traditional chain tool, over time, dirt and corrosion can make it very difficult to separate by hand
- Model number: QKML
Prices pulled from the Amazon Product Advertising API on:
Product prices and availability are accurate as of the date/time indicated and are subject to change. Any price and availability information displayed on [relevant Amazon Site(s), as applicable] at the time of purchase will apply to the purchase of this product.
If you already know your way around servicing bikes and understanding the mechanics of a chain, I would first try to use some basic pliers. Especially if you already know how to do this without master link pliers, it might be a waste of money. For me, there is no difference at all in using normal pliers instead of master link pliers. I’ve been using normal pliers for master links for years and never had any problems.
Is It Worth Buying a Chain Breaker Tool?
Absolutely, yes!
The necessity of a chain breaker tool is completely opposite from master link pliers. Reconnecting chains without a chain breaker tool is difficult and can result in chain damage.
However, there is a big difference between quality chain breaker tools like Park Tool CT-3.3 Bicycle Chain Tool and those cheap ones. Those cheap ones might work well at first, but there are countless problems with them. The most common one is that the pin on the tool flexes and breaks a lot. If you are not really careful with them, you can easily bend the chain.
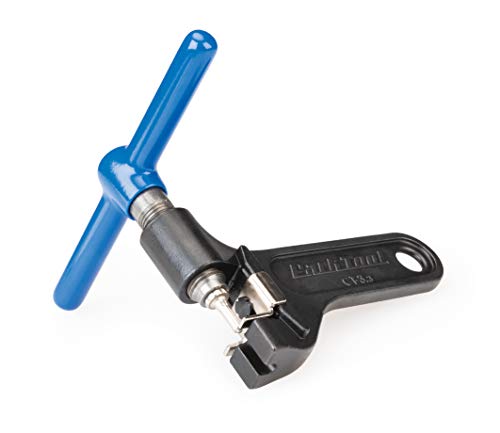
Park Tool CT-3.3 Bicycle Chain Tool has been my favorite for years. The quality is superb, and you can get original replacement pins at any time.
To conclude, a quality chain breaker tool reconnects chains in seconds and won’t damage your chain. It is an essential tool for a bike mechanic and even someone who just wants to fix things on his or her bike occasionally.
Before You Hit the Road or Trail
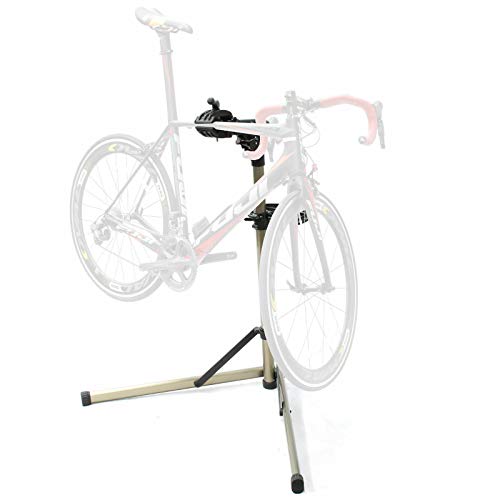
If you are doing this for the first time or are still unsure if you did it right, test the chain a bit before going on your way.
I like to put the bike on a bike repair stand and change the gears a bit to see if the chain is getting stuck somewhere. It’s an excellent opportunity to lubricate the chain and maybe even check the gears.
If everything seems to be in order, try to do some short rides and put some pressure on the chain, especially if you plan to ride some trails. It’s always better to notice any problems before it ruins your fun on the trail.