
Everyone who has ever cut a brake or gear cable housing knows how frustrating it can be when you can’t get that clean cut required for the cable to move smoothly. Even worse is when you install it that way, and it starts collapsing on itself with any pressure applied by the brakes or shifters. It makes the bike perform badly.
In this article, I will talk about which tools are great for cutting cables and cable housings, what alternative tools you can use, which tools to avoid, and small details to take cable and housing cutting to perfection.
To properly cut bike cable housing, you need to use a cable housing cutter tool, which is made to apply pressure equally on each side and make a clean cut. To determine the proper length, make sure there is enough cable housing so that the ends are not bent. Alternatively, cable housings can be cleanly cut with a Dremel tool as well.
Before we get into details about how to cut and what tricks you can use to get those perfect cuts, let’s mention the differences between brake cable housings and gear cable housings.
What is the Difference Between Brake and Gear Cable Housing?
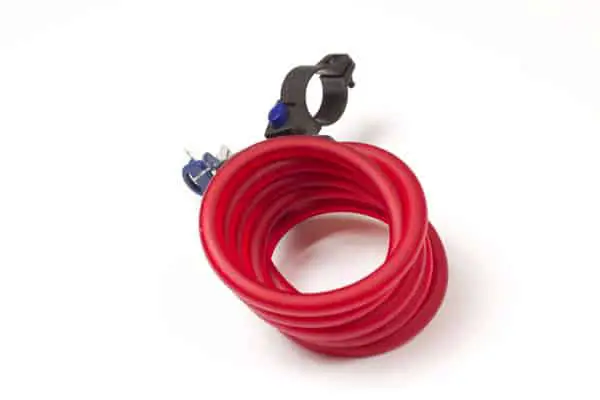
Historically, all cable housings were the same, with a coil type single wire as a structure. Today, only brake cables use this wound housing.
The reason for that is, at first, shifters were not numbered, meaning they didn’t have specific gear positions. They had a lever that you would pull and decide where is the right position for a certain gear by yourself. It worked okay for cassettes with fewer gears because the spacing between cogs on the cassette was much larger.
When cassettes started to grow in the number of gears they had, gear adjustment had to be more and more precise. That’s when shifters started having numbered positions for each gear.
But there was a problem.
The early years of numbered shifters had terribly inconsistent shifting. If you would adjust the cable tension to work fine in the first few gears, it was already completely misaligned with the cassette once you got to the last few gears. Everyone quickly realized what the problem was.
The coil type brake cable housing would compress a bit each time the cable was pulled. For the brakes, it rarely caused any problems. However, numbered shifters needed perfect precision. Therefore, compressionless gear housing started being used in bicycle shifters.
Compressionless cable housing has multiple longitudinal wires embedded in the housing. It prevents compression and makes cable housing much stiffer altogether. Gear cables switched to 4mm diameter instead of 5mm, which is the brake housing standard.
A third option works fine with both cable brakes and shifters, a braided cable housing. It has tiny braided wires to make it stiff enough for gear cable and durable enough to sustain greater braking forces. The diameter of 4.5mm, which most manufacturers use, is universal and works great for gears and brakes.
What Tool Do I Need to Cut Bike Cable Housing?
Ideally, it would be best to use a bicycle cable housing cutter like Park Tool CN-10 Professional Bicycle Cable and Housing Cutter. Some other cheaper variants are just not good enough, in my opinion. Park Tool always makes sure that their tools have everything you need and are of high quality.
There are many bicycle cable housing cutters, but most of them don’t have the crimper section to reshape the end. It’s essential to be able to do so properly. Using normal pliers for reshaping the end often damages the outer material, and you end up having problems with end caps.
Why Bike Cable Housing Cutter is Better Than Standard Wire Cutter
These professional bicycle cable and housing cutters squeeze the cable or housing on 4 sides at once. That’s what is required to achieve clean cuts, without which the end cap won’t sit properly at the end, and shifting or braking will soon become very poor.
The standard wire cutter is used for solid wire cutting, which hardly loses its shape when squeezed on two sides. Bicycle cables and housings, on the other hand, are susceptible to this. A standard diagonal wire cutter will mess up the end of a cable, and you won’t be able to push it through the housing.
How Can I Cut My Bike Cable Without a Cable Cutter?
The best alternative tool you can use is a Dremel tool. Dremel tools are rotary tools made for cutting and grinding. They can be used to get immaculate cuts. However, it’s way slower than with a bicycle cable cutter.
You need to use a cutting bit with a disc made for cutting metal, which if you don’t have is very cheap at any hardware store.
How to Cut Bicycle Brake Cable Housing
Brake cable housing is the thickest and requires the most force applied. That’s why the cut usually isn’t very clean and straight. Especially with wound housing which is the most common brake housing. Wound housing spiral wire tends to cover the brake housing’s hole when cut.
You need to cut that little piece away or push it back to its spiral place. I use a simple pick to move it away. However, if the end is too sharp you may want to cut it off instead. Cable and housing cutters are great choices to do that, but I often find it easier to do with normal wire cutters.
Gear cable housing is much more straightforward to cut. However, there are still some details to care about.
One important thing is that the end isn’t at an angle. It should be cut at 90 degrees or close to that. If it’s not, the wires pointing out won’t have enough strength to keep the end cap in place for long. In time, the end cap will squish those wires and your derailleurs will require adjusting.
How do You Cut A Bike Cable Without Fraying?
Cutting a bike cable without fraying can indeed be tricky, especially if you don’t have a good cable housing cutter like Park Tool CN-10 Professional Bicycle Cable and Housing Cutter.
The problem happens because a bike cable is weaved from multiple thin wires placed in a spiral. When you try to cut them with a normal wire cutter you squish them and it starts to fray on that end. It can cause a lot of problems if you didn’t route it through cable housing yet. Since it started fraying chances are it will get stuck inside the cable housing and fray itself completely by which point you have to cut it again.
However, there is a way to do this properly without a decent cable housing cutter. Using duct tape over a patch where you want to cut the cable works great. It will hold the cable’s structure in place while you make a cut with whatever you have at your disposal. After that, you can remove the duct tape or if it’s thin enough you can keep it until you route the cable through the cable housing.
Which Cable Housing End Caps to Use
End caps may not seem that relevant to this topic but they are the number one cause of cable housing breaking and needing to be cut. That’s why I want to talk about one thing that no one mentions; when to use metal and when plastic end caps.
It all comes down to the type of cable housing.
Wound cable housing used for brakes tends to snap when it bends. Since the wire structure is basically a coil it can withstand great forces along its length but there is nothing to prevent it from bending sideways. For this type of cable housing, you need to use plastic end caps because their flexibility prevents wound housing from snapping when bent sideways. Metal end caps have firm edges upon which wound housing easily breaks.
Compressionless gear or brake housing is quite the opposite. Longitudinal wiring prevents it from snapping sideways as long as the outside rubber coating isn’t damaged. However, shifters usually require the housing to be straight at the end so the cable can go straight into the derailleur for better precision. That’s one of the reasons why metal end caps work better with compressionless housing.
Another reason is that once you cut compressionless housing the wires tend to protrude a bit from constant cable tension. Plastic end caps get easily damaged from these structural wires.
Making sure that you choose the right cable housing end caps will make the whole gearing or braking system work much better and require changing and cutting much less often. Even if the cut isn’t perfect, choosing the right end cap can hide its imperfections and mitigate any drawbacks in performance.