
A bicycle chain is the single most maintenance-requiring component. They wear out, stretch, bend, break, and a million other things, including improper length. Sometimes, the only thing that’s broken is a tiny part of the chain. The question is: can you add links to a bike chain?
Yes, you can. You need a chain tool and master link pliers. You also need to know which method of adding links you can use on a specific chain type. Taking all that into account, you can save a broken chain or simply make a chain lengthier.
You will find on some websites that you can use one method on all the chains, but that’s not true. Making mistakes when putting the chain together can cause damage to your bike. I will specify which chain type requires which method later in the article.
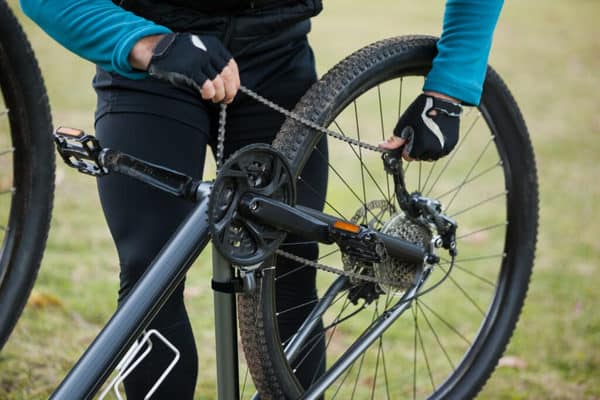
To find out if your chain isn’t of the correct length, shift into the largest chainring sprocket and the largest cassette cog. Even though you should not ride this way, every bike should function normally in these gears. If the derailleur appears to be stretched too much or even seems to be getting stuck/breaking, that means your chain is too short. It may seem like it’s riding okay, but you are actually risking chain drops and have reduced shifting quality.
Why Add Links to a Bike Chain?
If you repair a broken bike chain or replace it entirely, you need to make sure that you don’t end up with a short chain. This will necessitate some maintenance to add links to a bike chain.
A chain being too short is actually a bigger concern than it being too long. A long chain will result in it dropping and the possibility that your bike won’t be able to shift into all its gears. However, it can easily be shortened. But when you have a too-short chain, it can cause a lot of damage to the rear derailleur.
The chain won’t fall off if it is way too short. The slack won’t be big enough to allow it to fall off. But drivetrains are sensible, and even if you want to make your chain shorter because you don’t use certain gears anyway, you should not do that. Drivetrains require just the right amount of slack to function perfectly.
The main reasons for adding links to a bicycle chain are:
- The chain is too short and needs extra links.
- The chain is damaged and needs some links added or replaced.
Bicycle Chain Parts, Types, and Sizes
Before getting into methods of adding links to your bike chain, there needs to be some understanding of how chains and pins differ from each other.
What Does a Bicycle Chain Consist Of?
Bicycle chains consist of multiple pairs of steel outer and inner plates (or links). Between a set of outer and inner plates, there is a roller. The whole chain is held together by a rivet going through each roller. This rivet is a pin pressed through chain plates on each side while the roller’s hole is bigger in diameter so it can roll freely.
Modern bike chains follow the same standard regarding their pitch. The pitch is exactly 0.5 inches for all the chains, no matter how many gears they are made. Sprockets and their teeth are made to fit standard pitch, but they are still not interchangeable regarding the number of gears.
How Do Bicycle Chains Get Damaged?
There are two ways in which a bicycle chain can get damaged.
Wear
One is simply wearing out. This is normal for any chain. While the chain is in use, there is a lot of friction on plates and rollers. This tends to stretch the chain in time, and its pitch increases. The numbers are different for each chain size, but the general rule is when the pitch is stretched by 0.5%, it’s time to change the chain. A normal lifespan of a bicycle chain is around 3000 miles. This, however, depends on a lot of factors like the type of riding, lubrication, cleaning, weather, and so on.
The best tool to measure this is the Park Tool CC-2 Chain Checker for Bicycle Chains.
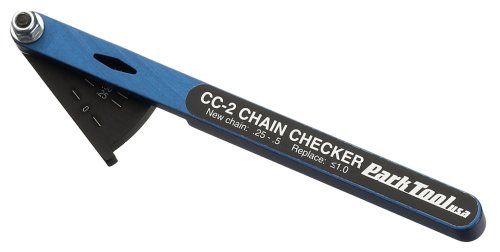
- This tool quickly checks chain stretch and wear it will determine if a chain is good or
Prices pulled from the Amazon Product Advertising API on:
Product prices and availability are accurate as of the date/time indicated and are subject to change. Any price and availability information displayed on [relevant Amazon Site(s), as applicable] at the time of purchase will apply to the purchase of this product.
A note to keep in mind when adding links to a bicycle chain
If the chain is already worn out a bit, you can’t add brand-new links to it. The pitch will be completely unbalanced, and the chain will cause multiple different problems, like skipping or falling off the sprockets. In this case, you can either find a piece of chain that is similarly worn out or replace the whole chain.
Forceful Damage
A chain can also be damaged by force. That doesn’t necessarily mean it needs to be broken, but it can be bent as well. Certain mistakes in shifting or derailleur being badly adjusted can cause the chain to get stuck and get damaged.
Once the chain is worn out, the risk of any of this happening increases.
How Do Bike Chains Differ in Size?
If chains all have the same pitch, how do they differ regarding the number of gears?
They are of different widths. There are three major categories for modern bicycle chains. A single-speed chain made for a single sprocket in the back, 5-8 speed chains made for 5-8 sprockets, and 9-12 speed chains made for 9-12 sprockets on the cassette.
The roller width for single-speed chains is 1/8 inch, while 5-8 gear chains use 3/32 inch rollers. A higher number of gears require thinner chains, so 9-12 speed chains use 11/128 inch rollers.
While it may seem like 9-12 speed chains are interchangeable, they are still not. They still differ in width because the plates are thinner for a higher number of gears.
These are the widths of each chain size:
- 12-rear cogs: 5.3 millimeters
- 11-rear cogs: 5.5 millimeters
- 10-rear cogs: 6 millimeters
- 9-rear cogs: 6.4 millimeters
- 8, 7, and 6-rear cogs: 7 millimeters
Basically, the chain needs to be compatible with both front and rear sprockets; otherwise, it will cause problems. If the chain is too narrow, it can fall into the gaps between chainrings. If the chain is too wide, it can get jammed by the derailleur or simply be too wide to fit into any cog on the cassette.
Chain Pin Types
Explaining why chain parts and sizes are important for this topic but not as relevant as explaining different pin types. It’s easy to understand how important the correct chain size is when you add links to a bicycle chain. However, I don’t understand why so many people ignore the fact that not all chain pins are the same.
There are two main pin types in bicycle chains. It’s important to distinguish these two types to know which method to use when adding links or repairing them.
A standard pin is a piece of steel that tightly fits into holes in the chain’s plates. This type of pin works fine for an average commuter but not for a serious mountain or road biker. The reason is that nothing but friction holds these pins from popping out. Under heavy load and during intense shifting, chains with pins like these won’t be durable enough. For this reason, these pins are normally used on up to 8-speed chains.
Flush-pin chains are a bit different. Flush pins hold the chain’s plates by being flushed so the small ring forms and prevents plates from popping out. These types of pins make chains a lot more durable and wear-resistant. However, you can’t add links to flush-pin chains with only a chain tool.
How to Add Links to a Bicycle Chain
As mentioned above, there are different methods for different chains. I will mention two of them which are generally used. I will exclude the ones that take into account having replacement pins from old chains that are completely taken apart. That would be too difficult to explain in words.
Adding Links by Reusing a Chain Pin
Tools needed:
- Comfortable T-handle
- Investment cast steel body
- Adjustable locating sh
Prices pulled from the Amazon Product Advertising API on:
Product prices and availability are accurate as of the date/time indicated and are subject to change. Any price and availability information displayed on [relevant Amazon Site(s), as applicable] at the time of purchase will apply to the purchase of this product.
This method works only with non-flush pin chains, which are usually 5-8 speed!
This first method has some minor complications that can come out of it, but generally, it’s quite a simple method to do. The process doesn’t require any additional tool or stuff to reconnect the chain but rather uses one of its pins. That said, adding links or repairing the chain this way can only be done on chains with standard pins and not the ones with flush pins.
The way you start this is by picking a pin and pushing it out with a chain tool. I like to push it from the direction of the bike facing outside so that reconnecting it later is easier to do. Remember not to push it all the way out; the pin must stay at least a bit inside the outer plate. The part of the chain that you wish to add to the original chain must have a pin pushed out like this as well. From this point, it’s time to reconnect both pins to close the chain.
Before doing that, use some chain lube on the pin and the roller where it will go through. This is important because while the pin is being pushed inside, it will squeeze the roller, and the chain sometimes gets stuck on that link. When pushing the pin back in, go slowly and make sure the chain link is firmly in its place on the chain tool. If it’s not, the outer plate can get damaged, and that link won’t be usable anymore.
When you have almost inserted the pin completely, make sure to notice how it feels. To know exactly when to stop, you can sense the pin being difficult to push and then all of a sudden really easy and then difficult again. The point where you need to stop is exactly at the moment it feels difficult for the second time. You might not get it on your first try, but luckily, you can push it back and forth until you get it right.
If the chain link is always stuck, no matter in which position the pin is, you may want to try to bend the link a bit. Take the chain with both hands on each side of that chain pin and try to flex it like you want to break the chain. Obviously, you are not trying to break the chain but merely flex those chainplates so they sit into place. With a few tries, you will get it. The important part is to check in the end that the pin is equally protruding on each side.
Adding Links by Using Additional Master/Quick Links
Tools needed:
This method works on all chains by adding master links that fit the proper chain size!
This is, in my opinion, the best method for all chains.
Can you have multiple master links? Yes. No one ever said that you couldn’t. If one master link is tough enough to hold the chain together, there is absolutely no difference in having several of them. In fact, just for research purposes, once we put together a chain with 17 chain links that we had just lying around the workshop, and it worked superbly. And those were all used master links.
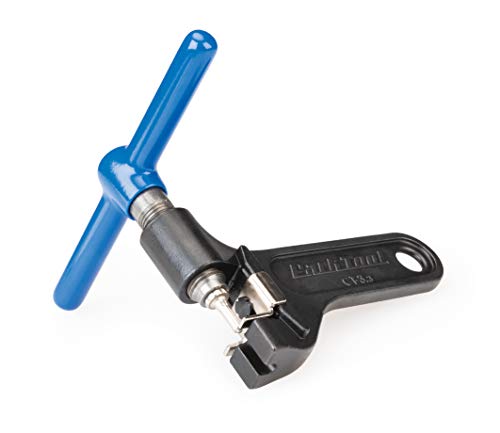
The method itself is way simpler than the first one. All you need to do is remove the outer chainplates and the pin on both sizes where the master link is to be placed using Park Tool CT-3.3 Bicycle Chain Tool. As long as there is a single proper chain link between the two master links, you can change the length or repair the chain this way multiple times.
To put the master link together and connect two parts of the chain, use Park Tool MLP-1.2 Bicycle Chain Master Link Pliers to open or close the quick link/master link.
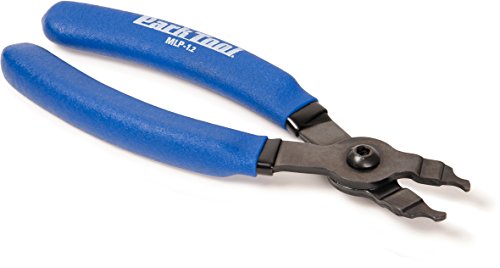
- An updated version of the original and best selling Park Master Link pliers
- Many non-Shimano derailleur chains use a master link that allows the chain to be installed and removed by hand
- While this type of master link doesnt require a traditional chain tool, over time, dirt and corrosion can make it very difficult to separate by hand
- Model number: QKML
Prices pulled from the Amazon Product Advertising API on:
Product prices and availability are accurate as of the date/time indicated and are subject to change. Any price and availability information displayed on [relevant Amazon Site(s), as applicable] at the time of purchase will apply to the purchase of this product.
Some chains are directional these days. Meaning they only go one way, not the other. If you install them the wrong way, shifting will be terrible, so make sure to check that out.
Measuring How Long a Bicycle Chain Should Be
Again, there are different methods on how to size a chain to its proper length. There are even variations of the same method depending on which type of bike you have. For example, some methods are applied a bit differently for full-suspension bikes.
Sizing a Chain Using the Original Chain
Probably the easiest and most straightforward way is to use your old chain to determine the size of a new one, assuming it was correctly sized in the first place.
This method is excellent because you don’t have to worry about what kind of bike you have since the method avoids any differences.
To make sure the old chain was correctly sized, shift your gears to both the smallest sprockets front and back. Check for any chain slack. The chain should not appear to hang loosely, and the derailleur’s upper pulley shouldn’t be in contact with the chain.
Next, shift the bike into the two largest sprockets. The chain should make this shift without any problems and have two slight bends at each pulley. The derailleur should be stretched at around 45 degrees to the ground and have a bit more room for stretching even further. That is to keep the chain as tight as possible while allowing the derailleur some slack.
Once you are sure the old chain is sized correctly, remove the chain and lay it straight somewhere. You can now size the new chain by comparing both chains next to each other or size it by counting the links. If you align them side by side, make sure to align each link as you go along because the old chain will be stretched a bit. Ignore the total length measurement. The chain is never measured by its length but rather by the number of links.

Sizing a Chain Using Two Biggest Sprockets
The proper way to determine bicycle chain length is by placing it in the largest cog and the largest chainring.
Once you have removed the old chain, shift both derailleurs to align them with the two biggest sprockets front and back.
The important part:
- If you have a full-suspension bike, you must take the shock off the frame on at least one bolt. Full suspension frames stretch the chain when compressed. In order to measure the chain length properly, you need to be able to keep the frame compressed at all times.
There are two ways to go about this. One is the usual method that has been used for years; however, it became a bit complicated these days because there is a variety of different derailleurs. The other one is commonly used these days by pretty much any mechanic I’ve ever met, and it’s a failproof method if you can visually decide on the length, which is actually not as difficult as it may sound.
The first method bypasses the rear derailleur completely. You need to align the front derailleur with the biggest chainring and place the chain through it and around the cassette’s biggest. The chain’s front end must be wrapped just until the bottom part of the chainring and not any further. While wrapped around the biggest cog, the rear end goes all the way to the front chainring to meet both chain ends. The chain can have minimal slack, and the point where the chain meets must be a logical connecting point while the rest of the chain just hangs down from there.
Now, the rule is simple. You need to add a few more chain links from the part which is hanging down to account for a rear derailleur cage. If the cassette’s biggest cog has up to 36 teeth, you count two more chain pins, and that’s where the cutting point is. For cogs bigger than 36 teeth, there is a bigger derailleur cage as well. For those cogs ranging from 36 to 52 teeth, you need to count four chain pins, and there is your cutting point. I will mention once again that the frame must be compressed completely during the measurement in the case of full-suspension bikes.
This method can sometimes give poor results because rear derailleur cages are a bit different depending on the brand.
The other, more common method these days is using a rear derailleur while measuring.
The procedure is similar at the beginning wrapping the chain around the biggest chainring. However, when wrapping around the biggest cassette’s cog, you should pull the chain through the derailleur cage. Now, pull the chain’s rear end towards the chainring and check how far the derailleur can stretch. It should go a considerable angle above 45 degrees to the ground. The way you decide the length is by looking at the derailleur cage and how the chain is stretched through it.
The chain wraps around two pulleys (small sprockets inside the derailleur’s cage). If you pull the derailleur cage too far, the chain will straighten out inside the cage. That’s when you know you went way too far. If it ever comes to that point, the chain gets stuck inside the derailleur cage, and you may break the derailleur. From that point, you give the chain some slack to allow the chain to wrap itself back around the pulleys. For most derailleurs, a good derailleur cage angle will be around 45 degrees, but you should always check how much room there is until it is stretched too far. It should be close to that point but still have a bit of room to stretch even further.
While keeping the derailleur in that position, connect to the front end of the chain. The point where both sides of the chain meet while keeping the derailleur tension in that position is your cutting point. In case the cutting point doesn’t align for a proper chain connection, account for an outer link or a master link by moving one pin left or right while making sure you always ease the tension on the derailleur and never increase it.
This method is completely failproof if done right because it doesn’t rely on guessing how many links you need to add to account for the derailleur’s cage size. Instead, it includes the derailleur cage in the sizing process.
Sizing a Bike Chain Using an Equation
There is also a simple equation to determine chain length. Because of the nature of how the chain works, you can only join the inner plates to the outer plates. That means we can only calculate using double links, which account for the inner link and outer plates as one. Together they equal 1 inch.
The equation to help you find the proper chain length is:
L = 2 (C) + (F/4 + R/4 + 1)
Explanation
- L = Length The length you need to cut the chain to is rounded to the nearest inch figure.
- C = Chain stay This is the distance between the center of the crank’s spindle to the rear axle center. It needs to be converted into decimals after it is measured.
- F = Front chainring This is the number of teeth you have on the largest chainring up-front. You can read the number of the inner side of the sprocket or simply count the teeth yourself.
- R = Rear cog This is the number of teeth you have on the largest cassette cog. This is usually engraved on the cog as well.
When you get the proper length, you will have to measure the chain and find the closest chain link. If it doesn’t align properly with the connection point, always choose the next one. It’s better to make a chain longer than shorter. Make sure to account for the master link if you intend to use one.