
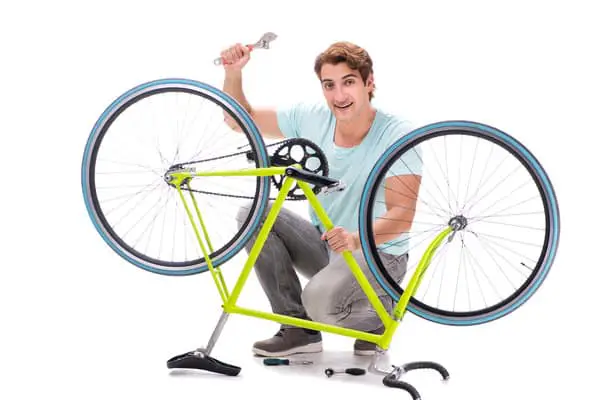
Removing bike pedals…not super fun, right? Whether you have bought a new mountain bike and it has shown up disassembled or if you just want to swap your pedals out for some fresh ones, you are going to need to know how to remove pedals and install them both correctly and safely. Unlike most things on your bike that are typically tightened clockwise and untightened counter-clockwise, bike pedals can be different. How exactly do you remove bike pedals?
When removing mountain bike pedals, you can use a pedal spanner or an Allen wrench to unscrew the pedals from the crank arms. Right pedals loosen by turning counter-clockwise, left pedals loosen clockwise, and it may be beneficial to use some bike grease or other applicable lubricant to aid the process.
In this comprehensive guide, we are going to explain exactly installing and removing bike pedals. We will also take a look at some of the most common ways to do this process and also take a look at the vast differences between right and left pedals, which can be confusing to many. Read on to find out exactly how to achieve this task without having to resort to taking your bike to a technician.
Types of Pedal Axis
Choosing the right mountain bike pedals can be a daunting task, with so many different options, including the age-old debate of flats versus clipless pedals. Whether you’re outfitting your new bike, looking to upgrade or are interested in trying something new. There are two main types of mountain bike pedals, flat or platform pedals and clipless pedals. Most people are familiar with flat or platform pedals – they’re found on tons of bikes.
Clipless pedals, meanwhile, are a bit more confusing because they are functionally “clip in” bike pedals, which use cleats to connect your shoes to the pedals. Read along and we’ll help you choose the best mountain bike pedals for you. When it comes down to choosing flat or clipless mountain bike pedals there are a lot of things to consider, and one style isn’t objectively better than the other – both have their pros and cons.
In general, flat pedals are good for beginner riders, riders that do a lot of tricks or jumps, and for times when you don’t want the commitment of being clipped in. Clipless pedals, meanwhile, are great for everyday riders who want the confidence of not slipping off the pedals, and those who are looking for the most efficiency in their pedaling. Below are some more specific details of both flat and clipless pedals.
Why Choose Flat MTB Pedals
- You value being able to take your foot off the pedals and put your foot down at any time
- You are a beginner rider
- You do a lot of tricks or slopestyle riding
- You’re riding slippery, wet terrain with unpredictable traction
- You’re scared of the commitment of clipless pedals
- You don’t want to buy dedicated mountain bike shoes
Why Choose Clipless MTB Pedals
- You value efficiency over convenience
- You want to be locked on while riding rough terrain
- You are okay with the learning curve
- You want better control of your bike
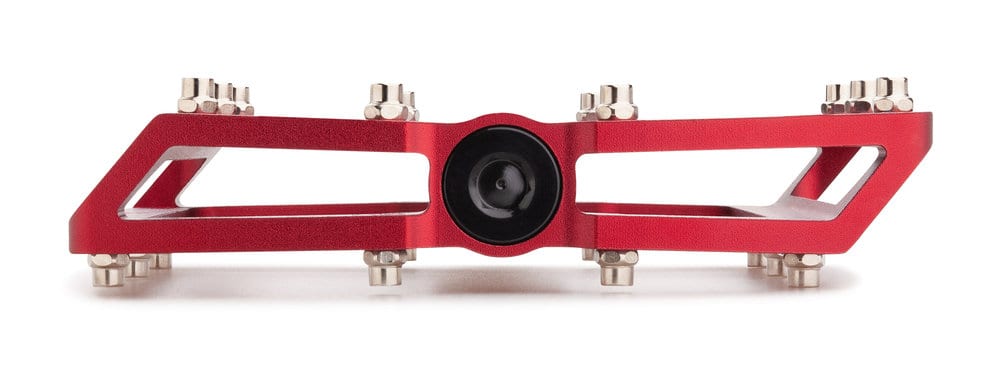
Flat, or platform, bike pedals are what most riders are used to. These pedals have a flat platform, allowing you to ride in any type of shoes. Flat pedals don’t have any cleats, cages, or clips tethering you to the pedal – you’re free to step on or off. Mountain bike flat pedals have small spikes, known as pins, that help to keep your shoes from slipping off the pedals – a painful and scary experience.
Most beginner mountain bikers will choose to use flat pedals because of the familiarity, no special shoes required and low commitment. There are a couple of important features to consider when choosing which flat pedals are right for you, flat pedals usually come in either metal or composite construction like nylon or various plastics. These materials have their pros and cons.
Metal flat pedals are durable, and they are resistant to rocks and other pedal strikes, where composite pedals can get scraped and gouged. Likewise, metal is stiffer, leading to better power transfer. On the flip side, composite pedals do the job well for less money.
Flat Pedal Size
The next thing to consider is the size of the platform. The larger the pedal, the more evenly force will be distributed when pedaling and standing on the pedals, meaning they’ll be comfortable. A larger mountain bike pedal also means you’re less likely to slip off the pedal. Pedals can be too big, however, if the platform is larger than your shoes, or if you aren’t able to properly engage all of the pins.
Useful tip: Many pedals come in multiple sizes, allowing you to get the right size for your foot and shoe size.
While they’re still called flats, some platform pedals are built with a small bit of concavity or convexity in order to increase grip. It’s possible to achieve a similar effect by changing the length of the pins on your pedal, too, raising or lowering the inside pins relative to the outside pins. These pedals can give you an even better grip than truly flat platform pedals.
Flat Pedal Pins
In short, the more pins in the bike pedal, and the longer the pins, the better grip you will get between your shoes and your pedals. We recommend that mountain bikers look for flat pedals with 10-12 pins per side. There are a couple of other pin-related items to consider as well. Some pedals, usually cheaper composited pedals, have the pins molded into the pedal, meaning that they’re not replaceable.
Other flat pedals let you adjust and replace the pins with an allen key. This means that you have the ability to customize how “sticky” your pedals are and replace pins if they break, fall out, or get dull.
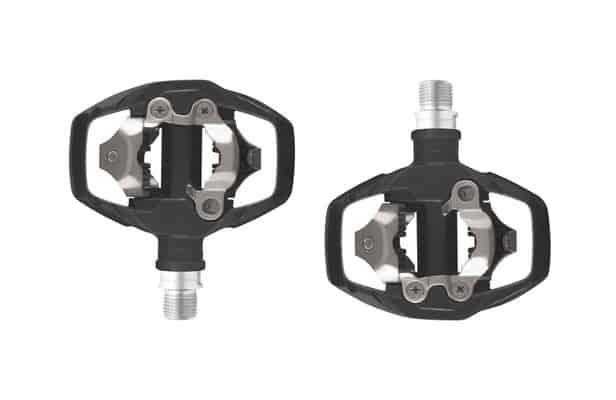
Counterintuitively, clipless pedals use a mechanical attachment between your shoe and the pedal (the term “clipless” refers to the lack of a toe clip or “basket”). Mountain clipless pedals use a shoe with lugged soles and a recessed cleat that enables walking, which can make them an ideal choice for casual road commuters too. Most mountain clipless pedal systems use a “2-hole” design and have adjustable tension to fine tune the release to your weight and strength.
Clipless systems connect you solidly to the pedal and release when you twist your foot; many styles offer some degree of lateral “float” which can be great for those with knee problems.
As mentioned above, clipless mountain bike pedals work with two-bolt mountain bike style cleats and are most often dual-sided, with a larger platform than clipless road bike pedals. This wider platform offers a better feel on the pedals when you’re standing, like when you’re descending. Some clipless mountain bike pedals even have wide platforms with pins, similar to flat pedals, for supreme traction, power transmission, and feel.
Many clipless mountain bike pedals use Shimano’s SPD cleat system, however, there are a couple of alternatives as well. SPD stands for Speed Pedaling Dynamics, and has emerged as the near-ubiquitous system for mountain bike clipless pedals. Other systems do exist, so make sure your cleats and pedals are compatible while shopping.
Float is a common spec to see listed with clipless pedals – this number refers to the degrees of rotation built into the pedal while clipped in. Float gives you some margin for error and lets you use your feet and lower body to steer the bike. Almost all mountain bike clipless pedals have some degree of float. The smaller the float angle, the more likely you are to release unintentionally, and your margin for error is smaller.
There is a difference, however, between the float and the angle at which you release from the pedal, creating a bit of a gray area in between the two values. Mountain bike shoes use a two-bolt cleat, compared to the three-bolt pattern found on clipless road bike shoes and cleats. Aside from this cleat functionality, you’ll want to consider the shape of the shoes and the pedals. Some clipless mountain bike shoes look more like a road bike shoe, with more curvature in the sole, and different sole patterns.
These types of shoes might contact the wide platforms and pins of clipless mountain bike shoes differently than more flat skate-style clipless mountain bike shoes, which have flatter soles, more like shoes built for flat pedals. Neither style is superior – it really comes down to preference, but it’s important to pay attention to how the cage or platform contacts the shoe to ensure the best traction and feel.
Pedals can be adjusted somewhat, with spacers and by changing the height of the pins.
How to Use Clipless MTB Pedals
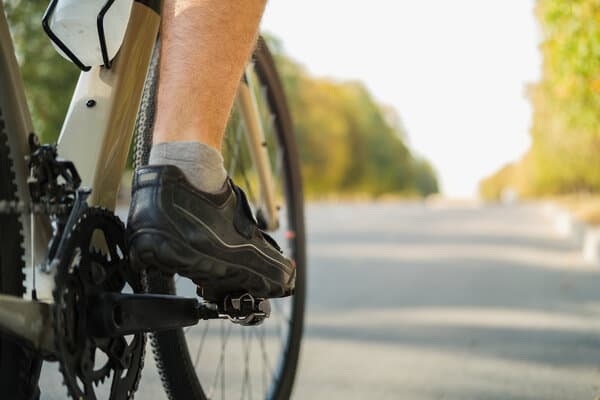
While it may seem intimidating at first, riding with clipless pedals will quickly become second-nature with a little bit of practice. We recommend starting out by putting your bike next to a wall, or something you can hang on to, so you can hold on and stay stable while practicing clipping and unclipping.
To clip into clipless pedals, place the cleat on the pedal, sliding it forward slightly with some downward pressure. Most mountain bike clipless pedals are dual-sided, it doesn’t matter which side you clip into. When you’ve had some practice clipping in with both feet, you’re ready to ride. Start with the foot that you start your pedal stroke with. Clip in and get some momentum, and once you’re moving and stable, you can clip in your other foot.
To release from clipless pedals, simply twist your heel out, away from the bike. You’ll find that unclipping is easier than you might think, though everyone has had a fall or two when they’ve forgotten to unclip, it’s part of the game! Some riders might be worried about unclipping, or not unclipping when they fall. More often than not, the act of falling will automatically unclip you from the pedals, keeping you from getting tangled up with your bike.
Removing Bike Pedals With an Allen Key
Before you start removing pedals, move the chain into the large chainring. This will prevent the teeth of the large chainring cutting your hands in the event of a slip or poor hand position.
If you are using an Allen Key when removing pedals, you will need to access the Hex fitting from the inside of the crank arm. Start by placing the short arm of the Allen Key into the Hex fitting, enabling you to create leverage with the long arm.
Fix the Allen Key into position with the crank arm at 6 O’Clock (pointing towards the ground) and the Allen Key at 90 degrees to the crank arm, at 3 O’Clock (pointing towards the back of the bike). Hold the pedal still and push in a clockwise direction on the Allen Key until the pedal comes loose. The same process applies for removal of the pedals on the Drive Side, but this time in an anti-clockwise direction.
Fix the Allen Key into position with the crank arm at 6 O’Clock (pointing towards the ground) and the Allen Key at 90 degrees to the crank arm, at 3 O’Clock (pointing towards the back of the bike). Hold the pedal still and push in an anti-clockwise direction on the Allen Key until the pedal comes loose.
Fitting Pedals With an Allen Key
Before replacing the pedals, now is a good time to clean the thread on the pedals and inside of the cranks. Remove any dirt, grime and moisture with a towel or soft fabric before replacing the pedals. Once the threads of the pedal and crank arm are clean and dry, apply some grease or another type of anti-cease compound onto the pedal and crank arms threads. This is to ensure your pedal doesn’t get locked into position and become impossible to remove in the future.
It will also make it easier to tighten the pedal into position. Place the pedal into the crank arm and use the Allen key (from the inside) to tighten the pedal. For the drive side turn clockwise, and anti-clockwise for the non-drive side. Keep turning the Allen key until the pedal is tight.
Removing Bike Pedals With a Pedal Wrench

If you are using a Pedal Wrench when removing bike pedals, you will be able to access the ‘Wrench Flat’ area of the pedal spindle from outside the crank arm. Start by placing the Pedal Wrench onto the pedal spindle with the crank arm at 9 O’Clock (facing towards the front of the bike) and the Pedal Wrench at 3 O’Clock (towards the rear of the bike). Hold the pedal still and push down on the wrench in an anti-clockwise direction until the pedal comes loose.
In both instances, once the pedal has been loosened, keep turning the pedal in the same direction until it comes off.
A good way to remember which way the pedals come off is to think that the Allen Key or Pedal Wrench will move in the opposite direction to the normal pedaling action. The same process applies when using a Pedal Wrench on the Drive Side. Start by placing the Pedal Wrench onto the pedal spindle with the crank arm at 9 O’Clock (facing towards the front of the bike) and the Pedal Wrench at 3 O’Clock (towards the rear of the bike).
Hold the pedal still and push down on the wrench in an anti-clockwise direction until the pedal comes loose.
Fitting Pedals With a Pedal Wrench
Start by screwing the pedal into the crank arm by hand until you feel some resistance. Then place the Pedal Wrench into position and begin to tighten, clockwise for the drive side, and anti-clockwise for the non-drive side. How hard is too hard? It’s hard to know exactly how tight pedals need to be. 360 inch-pounds of torque is the common measurement for pedals, which equates to about 12-15kg of force exerted onto a Pedal Wrench.
Try to get the pedal as tight as possible without having to put your whole body into it. Arm tight should be enough. If you have carbon crank arms it is wise to place a washer between the crank arm and the pedal. That way the pedal spindle won’t tighten into the crank arm.
Just like every other element of your bike, pedals need to be serviced to ensure they are smooth and performing optimally.
Make a point to get them checked every 6-12 months, which will also serve as a good reminder to take them off and re-grease them.
Right vs. Left: Which Way to Unscrew Bike Pedals
In order to decide the difference between right and left unscrewing, you will first need to mount the bike in the repair stand and shift the chain to the largest chainring. This helps protect against cuts from chainring teeth. Rotate the bike until the right pedal is easily accessed. Try different wrench positions until the wrench and crank arm form an angle of 90 degrees or less, as seen below. Correct mechanical advantage is critical on pedals, which are often overly tight.
If possible, grab the opposite crank for the second lever. Turn the pedal wrench counter-clockwise to remove the right pedal or turn crank so the pedal is pedaling forward. Use care not to abrade skin. Continue to turn the wrench counter-clockwise and remove the pedal completely from the crank.
Rotate the bike as necessary until the left pedal is easily accessed. Position pedal wrench for good mechanical advantage onto left pedal, and grab right crank for second lever.
Turn the pedal wrench clockwise to remove the left pedal or turn crank so the pedal is pedaling forward. Remove the left pedal completely from the crank. Some models and makes of pedal do not use a pedal wrench flat.
These pedals will typically have a 8mm hex fitting in the back side of the pedal thread. Use an 8mm hex wrench in this fitting to remove and secure the pedals. When turning the pedals, keep in mind the wrench is on the back side of the pedal. The pedal thread direction has not changed, but the appearance of the wrench turning “clockwise” or “counter-clockwise” will appear different.
View the wrench from the orientation of the pedals, standing to the right side of the bike for the right pedal, and the left side of the bike for the left pedal. Turn the wrench accordingly. Rotate the bike as necessary to access the inside of the crank. Select a position that will give you a good mechanical advantage and secure the pedals.
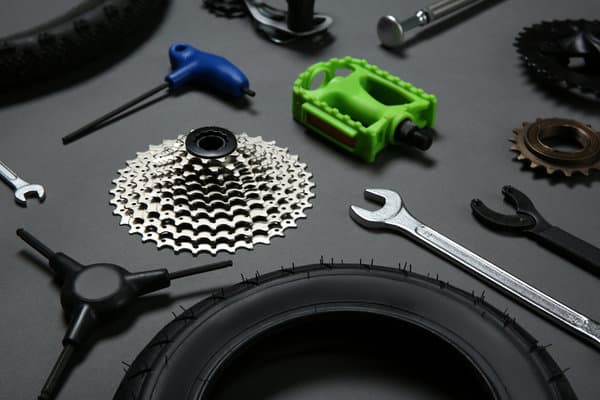
What Tools Do You Need When Removing Pedals?
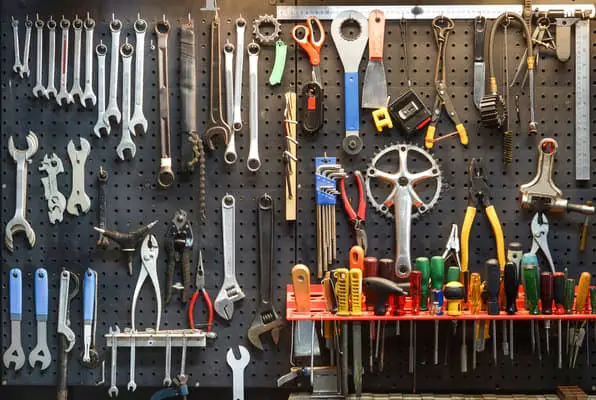
Technique for removing bike pedals with a wrench is less important than getting leverage with a wide variety of tools. Leverage is the key. Or perhaps we can say that the key technique is gaining enough leverage.
Generally speaking, a lot of force is required to remove an old pedal and then properly install a new one. In this section I’ll cover a number of bike pedal removal tool designs. I haven’t covered all the variations, of which there are many. But one model could be your main removal and installation tool with perhaps one more to offer an alternative if your go-to choice does not work out.
Bike maintenance and repair often requires creative solutions to seemingly simple problems. Having a variety of tools on hand makes those solutions possible. Tools divide into two categories: short handled and medium-long handled. The longer the handle, the more leverage of course. 15mm jaws is the standard size across the board.
“Better” in relation to bike pedal removal tools means increasing the ease and convenience of pedal removal. Depending on the exact context of use the best tools have:
- longer handles
- insulated grips
- angled heads
Straight 15mm Wrench
This basic wrench with 18cm of leverage length—although lacking grip insulation at the socket end exactly where you need it—is enough for most pedal removal jobs. The 14, and 15mm sockets are a handy addition as well. The method for using this is the same as with the Allen wrench described earlier—a swift strike with the palm of the hand to break axle and crank threads free from each other.
Or take a firm hold of the broad surface and with your body behind the motion, wrench the crank and pedal threads free of each other.
Double Ended
The 15mm jaw you’ll make use of 99 times out of 100, is at both ends. One end has a 16mm jaw added; the other, 17mm. The 15 or so degrees of angle relative to the grip puts space between hand and bike frame, so when it slips—sooner or later it will if you’re doing this often—you’re much less likely to tear a chunk out of your fingers.
Having a rubber padded grip is essential since all the energy that goes into removing a bike pedal is expended breaking the pedal threads free from the crank threads.
Together with your glove, the rubber insulates your hand from the stress. The tool’s edges would cut into exposed flesh making the pedal impossible to budge.
The 19cm from the wrench jaws to the grip point next to the opposite end provides enough leverage except in the case of a pedal fused to the crank, assuming you can steady your bike to ensure leverage in the first place of course.
Medium Length Handle
The 25cm between the non-slip insulating grip and the pedal contact point, together with the angled pedal contact puts this one a level above the previous model. You can also extend the handle, although you’ll hardly ever have to do that given the sheer length—no pedal on a stand-suspended bike will hold out for long.
The option to beef up leverage where pedals are really stuck comes from using a length of pipe. An old seat post also does the job. Here we’re using a crown race driver.
This method is best applied when a bike is suspended in a maintenance stand.
Allen Wrench
For pedals that take an 8mm Allen wrench, this is the go-to tool.
A firm grip in the right position gives you the leverage you need to break a pedal free.
Heavy Duty
And by heavy duty I mean professional shop tools. A hand molded grip on a 1ft handle makes short work of bike pedal removal. Again, it’s best applied to a bike suspended in a stand, since you don’t have an angled head to work with making it easy to keep your hand and fingers out of the impact-the-frame zone. 15mm jaws on both sides increase the convenience of fitting the jaws onto the pedal at awkward angles.
Allen Wrench Extension
This piece allows turbo-charge Allen-wrench leverage and is best used with the longest handled wrench available. An extra few centimeters exponentially increases the leverage you can apply. Only pedals rusted into the crank can resist. Apart from very entry-level models, most pedals will take an Allen wrench at the crank. Most are 6mm, with the very high end, Dura Ace clipless pedals for example, take an 8mm wrench.
This Allen wrench extension has an 8mm head on the left and a 6mm head on the right.The center has two parallel machined surfaces to fit a 15mm wrench. Coupled with the Heavy Duty Pro wrench with its 22cm of leverage and hand-molded grip, only pedals fused to the crank can resist the torque you can exert on them using this method.
This wrench and the previous are most conveniently used where you have space to work. Either one will do if your bike is suspended from a stand.
Portable Bike Pedal Wrenches
For the best overall experience, there should never be any need for bike pedal removal or tightening out on the road. Correct installation at the right torque (35+ Nm) makes it unnecessary.
But there may be contexts such as on a group ride having one handy may be useful. Here, then, are two possibilities. Both work on the core assumed need for a tire lever and spoke adjustment functions in addition to the 15mm jaws. You could opt for the 14 and 15mm sockets.
Or go for the bottle opener.
Taiwanese tool makers often include bottle openers on all sorts of bike tools; relevant for a very small minority of beer drinkers, but not for many other categories of cyclist you would think. Nevertheless, you would have nothing to lose taking one out on a group ride.
Step by Step Guide to Removing Bike Pedals
While they seem simple, pedals can be very annoying to work with, since they’re attached to a part of the bike that moves freely: the crank. Additionally, pedals tend to tighten up the more you ride your bike, and if they’re really old or installed without any grease, they can become very stuck. The part of the pedal that has threads is called a spindle, and the rest of the pedal is generally called the body or cage.
While there are many styles of pedals out there the most important thing to know about them is that the left pedal is always reverse-threaded, also referred to as having left-hand threads. This means that you will loosen and tighten the left pedal in the opposite direction that you would turn a normal bolt or screw. The right pedal always has standard, or right-hand, threads, therefore you tighten or loosen the right pedal normally.
Since the bicycle crank moves, we want to immobilize it in order to make unscrewing the pedal a piece of cake. For this you’ll need a strap, and any non-elastic strap will do, whether it’s of the buckle, cam, or velcro variety. Pedal toe clip straps work great for this purpose! Whatever strap you use, just make sure that you’re able to get it pretty darn tight.
Whichever pedal you are planning to remove, you’ll want to strap the opposite crank arm and pedal onto the bike frame. I prefer using the chainstay (which connects the crank/bottom bracket to the rear axle) as it’s closest to the crank arm and will create the most solid connection: the seat tube (which the seatpost is inserted into) or down tube (which connects the headset/fork to the crank/bottom bracket) will work fine as well.
Remember, as I mentioned previously, the right pedal has normal threads while the left is always reverse-threaded (trust me, you don’t want to get this one wrong!) When removing pedals, you want to think about mechanical advantage. This is a fancy term for the clever usage of your muscles, tools, and gravity in order to perform a given task. The reason I’m pushing the wrench downwards is that I’m trying to utilize gravity as well as my body weight.
Trust me, sometimes just angling a wrench a few degrees will make all the difference when you’re trying to remove a seized pedal on your daughter’s purple Huffy Princess bike, for that matter. If you’re using a hex wrench to unscrew a pedal from behind, your chances of turning the wrench the wrong way are increased.
After strapping the left crank to the chainstay, I’m using a normal 6mm hex wrench, and an old seatpost as an extension to provide extra leverage. I’m also wearing a sturdy leather work glove, to protect my knuckles as I apply force to the wrench: Remember that even though the hex wrench is inserted from the back side of the crank, it will need to move in the same direction relative to the crank as a pedal wrench inserted from the front of the crank.
If this just made you even more confused, simply start back over at the beginning of this section.
Most pedals will need a good initial push of the pedal wrench to loosen, so don’t be afraid to really give it all you’ve got! All the while being mindful of your hands, and the bike. After you’ve forced the pedal to move a bit, set the wrench aside and try to unscrew it with your hand. If the going is too rough, by all means keep using the tool, but go slow, especially as you get towards the end of the threads.
To finish, undo the last few threads by hand, as this will minimize potential damage to the outer crank threads, and prevent dropping of the pedal. If this is your first bicycle pedal removal, give yourself a pat on the back!
Pedal Installation
First, inspect the crank and pedal threads, and the pedals overall. If the threads don’t look damaged and you’re certain you’ve got the correct ½-inch or 9/16-inch spindle size, and the right and left pedals are correctly identified, you are ready to start. Dab a little bit of waterproof grease and start threading the pedal in by hand to ensure the pedal is going in perfectly straight.
If the going is rough, make sure once again that you have the correct left or right pedal. If you can’t get the pedal started this way, this usually means that either the pedal and/or crank threads are damaged. Just to be sure, clean out the crank threads with a brush or rag, do the same with the pedal threads, lubricate, and try again.
If you deem that the crank threads are damaged or worn out, there is a neat first-line-of-defense trick that might just help: dab some thin lubricant onto the threads and install the pedal from the back of the crank arm. This might just fix (or “chase”) the threads just enough for you to be able to install the pedal. This is a trick, and there is of course a proper way to do this, with a special tool called a pedal tap.
You will need the Park Tool Pedal 9/16-inch Taps (or a cheaper version) and a tap handle like the Park Tool Tap Handle is required. I don’t recommend buying these tools unless you have previous experience with this sort of thing, and have a unique or expensive crank you’re trying to salvage. Even then, this is a job probably better done by your local bike shop and I won’t go into the procedure here.
If the threads are not repairable, the shop might be able to replace the threads with an insert, but it’s likely they’ll just try to sell you a new crank, or the left crank arm, if that’s where the damage is.
Troubleshooting When Removing Bike Pedals: How to Remove a Really Stuck or Seized Pedal
Most pedal spindles are made of steel, and the majority of cranks are aluminum. Metals of different types can corrode and bond chemically over time, especially if the connection was not initially lubricated. If you’ve got a seized-up pedal and no access to a time machine to jump back in time to grease it up, there are a couple of options:
- First, try to remove the pedal with the biggest wrench you have, or grab a pipe or handlebar extension. A seatpost or old pair of handlebars might work. Some extra leverage might be all you need.
- Second, behold the magic loosening power of penetrating oil – Liquid Wrench is my favorite. This is a special liquid that is very thin and slippery, and is designed to work its way in between seized-up mechanical parts. WD-40 will also work, and in a pinch even regular chain lube like Boeshield or Tri-Flow might also help.
- Here’s how I recommend doing it: lay your bike gently on its side with the seized pedal pointing upwards, then squirt some of the oil around the spindle and into the pedal threads. Wipe up the excess and wait at least 15 minutes, but if you’re working with an old bike with a lot of rust on it, a few hours or overnight is even better.
- Sleep with your fingers crossed. Then try removing the pedal again.
I have to add that over the several years of frequenting my local bike shop, I’ve encountered a handful of pedals that were so seized onto the crank that no amount of lubricant or force could help. I’d say this probably happens about once a year. In a professional environment, knowing when to give up is a good skill to have, especially since the work is being done on your bike and your hard-earned money is precious.
In your garage, trying to remove a pedal from your beloved old Schwinn Varsity 10-speed bike might be an all day project, and that’s just fine, as long as you reward yourself with an amazing and thrilling ride later on. The next step to replace the bike pedal involves inserting the correct pedal into the hole of the corresponding crank arm. Always insert the spindle at a 90-degree angle.
Remember, an “R”-marked spindle goes to the right crank arm; “L” pedal to the left.
Insert your hex wrench or Allen key into the crank arm port. If your bike does not have a port, you can use a pedal wrench on the pedal spindle flats. Push your wrench to the left side (counter clockwise) if you are tightening the left pedal. Rotate the pedal wrench to the right side (clockwise) if you are fastening the right pedal. Make sure it is tight. Be careful when using the wrench to avoid over-tightening the spindle.
If it is too tight, you might strip or damage the thread. If loose, you risk losing your pedal mid-ride because. You might want to check the pedal’s correct torque. Use your wrench to turn the spindle about 1/8 further to ensure proper fastening if you do not find manufacturer-recommended torque settings.
Loosen them with an Allen wrench, hex wrench, or a pedal wrench. and apply more bike grease onto the pedal threads. Go for a ride and check the overall pedal function. If you are unsatisfied with the results, you can always bring it to a professional. A mechanic can recheck and evaluate other mechanical problems, while adjusting the pedals with a wrench.
Step by Step Guide to Installing Bike Pedals
Begin by identifying the right and left pedals. Look for “L” and “R” markings on axle or wrench flats. If no “L” and “R” marking are seen, use pedal thread direction to identify pedals. Left threaded pedals (threads sloping upward to the left) go to the left crank. Right threaded pedals (threads sloping upward to the right) go to the right crank.
- Heavily grease threads of both pedals.
- Using fingers on wrench flats, thread the right side pedal into the right crank. Use a wrench to snug the pedal.
- Position wrench on flats for good mechanical advantage. Hold the wrench with one hand while holding the opposite crank with the other. (Pedal the bike backward to install both left and right.)
- Using the opposite arm as a second lever, tighten the pedal. Repeat process for left pedal, but threading pedal counter-clockwise to install. Typical torque for pedal thread is about 360 inch-pounds. With a foot-long wrench, that is about 30 pounds of effort.
If the pedal is difficult to thread into the arm, or if the threads in the crank are damaged, there may be some repair possible by chasing them with a tap. For 9/16″ x 20 tpi pedals, use tap set TAP-6. For 1/2″ x 20 tpi pedals, use tap set TAP-3. Taps will align damaged threads, but will not restore metal that is simply removed. If no threads are left, have a professional mechanic install a pedal bushing kit.