
When out riding our mountain bikes, one of the easiest aspects of our bikes to forget is the overall tire pressure. Mountain bike tire pressure is very important to ensure you have the smoothest and most effective mountain bike ride possible. There are many different things to keep in mind when it comes to mountain bike tire pressure, but what are the most important aspects of mountain bike tire pressure?
Tire pressure makes a big difference in how your mountain bike rides, and there are quite a few things that will influence how you set your tire pressure. The type of mountain bike, the type of tires you’ve got, the conditions you are riding in, and your overall skill level are all crucially important.
In this comprehensive guide, we are going to take a look at several different types of bikes to better provide you with useful information on better setting your mountain bike’s tire pressure. Mountain bike tire pressure is not like ordinary bicycles or even other sport’s bicycles, so it is important to know all the different dynamics in terms of bike type, size, dimensions, and how tire pressure corresponds to all of this.
MTB Tire Pressure
With MTB, there is perhaps nothing more important than the air in your tires.
Depending on your experience level, you might be able to gauge your PSI with a quick pinch of the tire. Or, you might be a little surprised to hear that bike tires need to be checked far more regularly than those on your car. This how-to guide is geared toward the latter group of cyclists, beginners. But hopefully, riders of every ability level can learn a little more about the precious pressurized air that keeps us all rolling.
Pneumatic tires on any vehicle are supported by pressurized air in an airtight chamber. Higher PSI (pounds per square inch) makes the tire harder. Lower PSI makes it feel softer. Tire pressure has a huge impact on how a bike performs. Checking your tire pressure is the simplest and most important piece of regular maintenance you can perform.
So where do you begin if you’re new to cycling and just got a road, mountain, gravel, or cyclocross bike? Conveniently, every bike tire has recommended PSI stamped into the rubber on the sidewall.
Helpful tip: If you’re mounting a tire, align that pressure rating next to the valve for easy reference.
Recommended tire pressure is about the intended use and the best range for that use. You need to find the sweet spot for a tire and figure out where the high pressure doesn’t have any risk of blowing off the rim and the low pressure won’t burp or rip off the rim.
Most mountain bike tires are rated for 25-50 PSI. Road tires are usually 80-120 PSI. Gravel tires are often 40-80 PSI. While they are a good starting point, those ranges are too broad and conservative for most riders.
What Is Bicycle Tire Pressure?
As you can see, road bike tire pressure is dictated by several factors. These include the width of your tires and your weight.
Let’s say you had bike tires that are 23 centimeters or about nine inches. You weigh 187 pounds. That means your tire pressure should be 115 pounds per square inch (PSI).
Let’s do another example. Now you have a bigger bike, one with tires that are 37 centimeters or about 15 inches wide. You weigh 242 pounds. You’d need a tire pressure of 87 PSI.
The bigger your tires, the lower the PSI.
Just look at this video for confirmation of that.
Tire pressure needs will always increase with your weight. If you’re riding a mountain bike instead of a road bike, the tire pressure is not going to be the same. The PSI varies if you have tubed or tubeless mountain bike tires.
If you use tubed tires that are between 2.35 and 2.4 inches, the pressure per tire should be 29 PSI. For tubeless tires that are the same size, the pressure should be slightly lower, just 26 PSI.
For larger tires, such as those that are three inches or bigger, the PSI increases. For tubed tires of that size, it’s 20 PSI, and for tubeless tires, it’s 18 PSI.
Ideal Mountain Bike Tire Pressure
If your bike tires aren’t completely empty, then they have at least some pressure. How do you know just how much pressure is okay and if your tires need to be inflated more (or even less)? You have to learn to read your bike’s tire pressure.
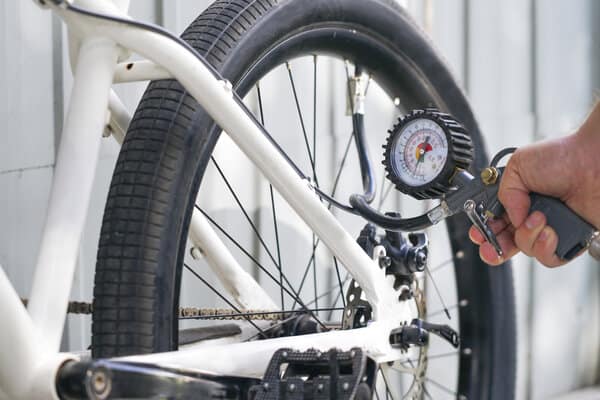
We recommend you use a tire pressure gauge if you’ve never tested the tire pressure of your bike before. While you can get a read without a gauge (and we’ll tell you how later), it can be difficult if you’re inexperienced.
First, you want to park your bike somewhere. Next, you want to figure out which type of valve your bike has.
Once you’ve got that figured out, you need to connect the pressure gauge to the valve. Now apply some downward pressure. You should see the gauge’s needle jump up. The pressure reading you get is how full your tires are.
If your tire pressure is good, then you can hop on your bike and keep riding. If the pressure is higher than you want, you’ll want to release some air. Depending on which type of valve you have, the way you do so varies.
For instance, if yours is a Presta valve, then you’ll want to find the top of the valve and turn it. Now push down on the valve and you should hear air coming out. Do this in increments, checking the tire pressure as you deflate. You don’t want the tire pressure to be too low!
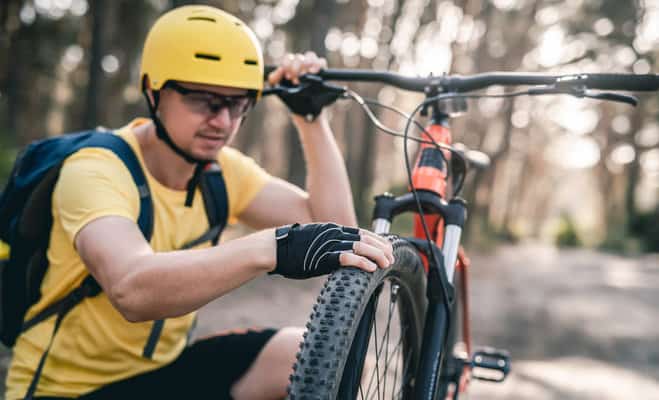
Squeeze the tire. If it feels a little empty, you might want to fill the bike up.
If the tire feels very firm, then the tire pressure is likely too high. You should be able to pinch the tire ever so slightly. That tells you the pressure is good.
Another trick is using puddles to your advantage. Ride through a puddle and then to dry land. Do your bike tires trail a lot of water behind you? If you have a thicker water trail, then more of the tire was hitting the ground beneath the puddle. That means you could probably afford to inflate the tires up a little.
Optimal Tire Pressure For Mountain Bike
There is no one perfect pressure that works perfectly for everyone. This is because we all ride differently, on different tires and different terrain. Also, personal preference makes a difference. Fear not, however, as the rest of this guide will show you how to find your own perfect tire pressure.
Once upon a time, the advice given to mountain bikers searching for their perfect tire pressure was simply, “Pump them up as hard as they go”–Luckily, those days are over and modern tires can be run at much lower pressures than before. But why should you run lower pressures? The benefits are numerous. Lower pressures generally allow for more grip, as the tire can deform around roots and rocks rather than bouncing over them.
This also makes for a more damped ride feel and improves traction and comfort on both climbs and descents. Lower pressures can also result in lower rolling resistance offroad as it takes less energy for a tire to deform around an obstacle (lower pressure) than it does lifting the bike and rider’s weight over it (higher pressure). But are there any drawbacks?
We don’t think so, as reasonably low pressures don’t negatively affect the rolling resistance of an MTB tire, and on top of that most modern tires don’t need high pressures to maintain their shape and corner well. BUT, there is a line where pressures become too low, so we will tell you how to find the perfect pressure for your riding. Your perfect tire pressure is something that is unique to you, the rider.
However, in order to find your perfect tire pressure, you have to consider several factors:
A rider’s weight influences their tire pressure the same way it influences their suspension – a lighter rider can get away with running less pressure and a heavier rider will have to run slightly higher pressures to get the same result.
The terrain you ride will have a massive effect on your perfect tire pressure. If you mainly ride smooth hard packed flow trails then you can get away with running slightly lower pressures, provided your tires maintain their shape through the corners. If you frequently ride trails with more rocks than a pebble beach, you should run higher pressures to protect your tires and rims.
Your riding style also plays a part here.
If you are known for hucking to flat or taking the straightest line through every rock garden, you should run higher pressures to protect your components. If your riding style is a little more precise and ‘light’, you can benefit from the extra grip and comfort gained by running lower pressures.
Does Tire Pressure Affect Speed?
For long distance and XC riding, rolling resistance is more important than ultimate grip because power output needs to be efficient. Plus, your chosen tires are likely to be light and relatively thin and flexy, so you’ll benefit from slightly higher pressures: think 28-30psi (1.9-2 bar) rear, 26-28psi (1.7-1.9 bar) front.
Going beyond 30-32psi (2-2.2 bar) on the rear and 30psi on the front is rarely beneficial on anything but the smoothest surfaces, especially if you need hard braking grip. The rougher, steeper and more technical your preferred trails, the more outright grip becomes the driving force, and the lower your ideal pressure is likely to be.
The traction, speed and control of tires that mold around roots and rocks instead of pinging and sliding off far outweighs any rolling speed lost on the occasional smooth spot, and it’s the same on the climb. Compliance and traction will get you further up technical climbs than nominally easy-rolling; hence the success of fat bikes and 27.5 plus bikes.
Tubeless tires are great for running lower pressures because there’s no risk of pinch punctures – though if you’re riding very aggressively you may still find that tires start flopping on the rims and require similar pressures as tubes while under pressure.
Now if you’re particularly large or heavy and find your tires squirm without higher pressures (mid 30s or above), swap to a tougher tire with a stiffer construction. Look for a higher Threads Per Inch count (TPI) for extra support. You’ll likely be faster overall with a heavier tire at workable pressures than with a lighter one that’s too full of air – and you’ll definitely feel more confident and comfortable.
Next time you head out with your MTB, why not take a pump and a pressure gauge, and experiment? You might be surprised just how much it changes your ride
Does Lowering Tire Pressure Increase Traction?
Back in the day of tubes, MTB riders had to run 30 PSI or higher on their mountain bike tires. If riders went much lower, there would be a risk of pinch flatting, or compressing and poking a hole in the tube between the tire and rim. I like using the analogy of a basketball for tire pressure. If a basketball is full of air and you bounce it, the ball will rebound hard and quickly off the surface.
In effect, if your mountain bike tire is too hard, you’ll hit a rock or root and bounce right off of it. The benefit of running lower tire pressures on singletrack allows for better traction and better ability to navigate technical sections. The tire will morph over the rock instead of bounce or slide off it so you don’t have to fight the trail. On loose sections, the tire will grip the trail harder instead of sliding off the top layer of dirt.
The tire will feel bendy, you can lose or burp air on rocks or corners, and it can roll off the rim in extreme cases. It can feel like you are dragging extra weight uphill. You’ll also hear blows to your rim or dings when you go over rocks. If you hear that sound, add more air.
What Tire Pressure Is Too High?
Although it is less common, having a high mountain bike tire pressure can also cause terrible problems for the rider. The most common of which is blowouts. Blowouts are characterized by a sudden loud bang followed by the immediate loss of most of the pressure of the tire. This is caused by a compression of the tire by an impact, coupled with an already high tire pressure.
The pressure, simply, becomes too high for the tubed or tubeless tire to withstand and so in tubed tires the inner tube tears and in the case of tubeless tires the seal is completely gone and all pressure is released. Another problem that goes along with too high of a mountain bike tire pressure is that of low traction and a loss of comfortability in riding.
Especially when riding on loose terrain, a lower pressure will allow the tire to conform to the ground beneath it creating more traction. Additionally, when the tire pressure is too high then the tire will become rigid and not conform to any sort of rough terrain, this will cause an unnecessarily uncomfortable ride.
What Tire Pressure Is Too Low?
If your mountain bike’s tire pressure is too low then a myriad of rim and tire damages can occur. One such problem that can occur are pinch cuts, also known as a “snake bite”. Pinch cuts are the result of hitting an angled surface like a rock or a pothole. Hitting a sharp edge causes a tire with low pressure to pinch the inner tube between the edge and the rim of the bike. Another problem that running low pressures can cause is burping.
Burping, in contrast to the previously mentioned problem, is associated with only tubeless tires. Burping occurs when the seal of the tubeless tire and the rim of the tire is temporarily broken by a hard landing or cornering. This results in a slight loss of tire pressure, although because the tire pressure was already low this could eventually lead to rim damage.
Rim damage is probably the most common issue with running lower than optimal tire pressure. Simply put, if the pressure of the tire is not high enough to absorb the weight of the rider and the impact of the terrain then the tire will bottom out and the rim will be taking the impact. This can cause the rim to bend or simply flatten out at one point. In either case this is usually the end of that rims life and will need to be replaced before the bike can be ridden again.
How To Gauge Bike Tire Pressure
One thing to remember, which can completely throw off all other considerations made in this article, is that not all tire pressure gauges are made to the same standard. While it is, admittedly, very tempting to buy a cheap tire pressure gauge; this is not a good idea. The best thing to do is to get a moderately priced tire pressure gauge that you trust and then always use only this gauge.
That way the readings should be consistent. Using different gauges can cause your tires actual pressure to be off between inflations. This is not really a problem if you are just casually riding your mountain bike every once in a while, but this is not the case for more regular use. Especially if you run at relatively low or relatively high pressures, this could cause problems
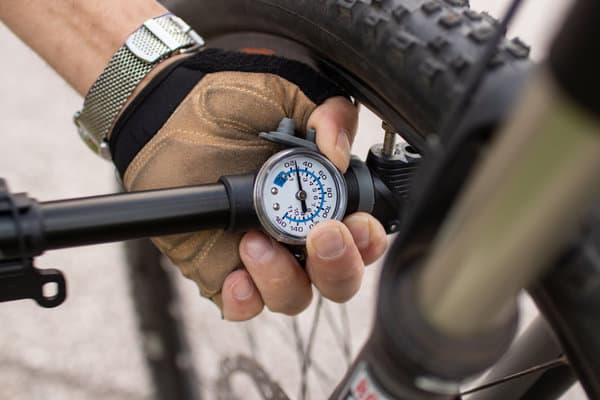
How To Read A Bike Tire Pressure Gauge
When deciding how to check bike tire pressure, using a digital tire pressure gauge mountain bike tool, a MTB tire pressure sensor or a bike tire pressure gauge are all good options. You just attach the air gauge to the valve of the tire. This is the only way to measure the air pressure inside the tire. This is the same for both the air gauge alone and the pump with air gauge.
Since a small amount of air leaks out when the air gauge is installed, it is recommended to inflate the air gauge to a higher pressure when checking the air pressure of high-pressure tires such as road bikes.
In the case of a memory type air pressure gauge, like a scale, instead of a digital type air pressure gauge, it will be difficult to understand how to read the memory before you get used to it.
The correct air pressure for tires is printed or stamped on the tire. There are three indices for air pressure: bar, kPa, and psi.
Bicycle air gauges often use the bar/psi system.
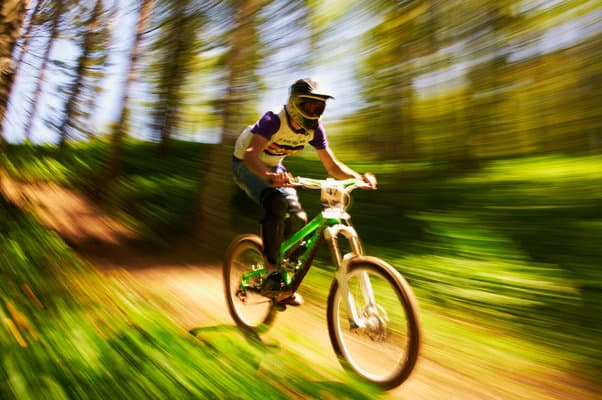
Downhill Tire Pressure
For downhill MTB, forget your fingers. If you want to learn how to get the most out of your tires, and have the most fun on your bike, you need to measure tire pressure. Your shop can order a good tire gauge for you, but you need to know what you are looking for. The gauge on most pumps covers a range from zero to 140 or higher. For a 29 inch tire, the critical range is likely between 18 and 28 psi, depending upon your weight, your skills and the terrain.
For Plus tires, that range is around 11 to 15 psi, and for fat tires (4-inch and wider), the sweet spot might be between 6 and 10. A dial gauge that goes beyond 100 is not going to be detailed enough for your needs.
There are analog (dial) gauges and digital gauges. Digital can be accurate and easy to read across the full range. Digital will require a battery, and some units, as crazy as it sounds, do not allow you to replace the battery. Do a bit of research first, looking for snazzy features such as auto shut-off and a replaceable battery.
There are analog gauges that have a range of zero to 30. If you are running tubeless, that is likely all you need.
A bleed-off valve is a very useful feature, and can be found on both digital and analog units, although reviews seem to question the effectiveness on some digital gauges. With a bleed-off, you can pump up higher than you need, then precisely let out air while the gauge is in place. Very handy, and far faster than removing the gauge, letting out some air, checking again, and repeating.
25 psi on your friend’s pump is not the same as 25 psi on your pump, and not the same as 25 psi on your handheld gauge. Don’t sweat it. Buy a gauge, use it regularly, and develop your tire pressure knowledge based on the consistency that comes from using the same gauge every time.
Useful tip: if you are traveling, you can rely on anyone’s floor pump, and never worry about what their gauge says. Pump up high, check with your gauge, bleed off as needed.
MTB Tire Pressure For Trail
Tire volume and rider weight are nice and predictable, but the terrain you’ll ride is not. This takes some trial and error to learn and mostly applies to mountain biking, gravel, or cyclocross.
Eventually, you’ll be able to look at your local trails and tell which might require a little more air pressure (think: chunky rocks that might pinch your tire and smash your rim), and which are smooth enough to be ridden with softer tires for better grip in corners. When you’re out riding, try to monitor the way your bike feels on bumpy terrain. Can you feel a harsh clunk when your wheel strikes a sharp rock? Your pressure might be too low.
Does your bike seem skittish in loose corners and bouncy on rough stretches? Perhaps try dropping your PSI a bit.
For road riding, tire pressure won’t vary as much. However, the conventional wisdom of pumping up tires to a rock-hard 120-130 PSI has been debunked. Unless your pavement is glass-smooth, pressures in the 90-100 PSI range will be faster. The tire will absorb slight bumps and vibrations, which is faster than an unyielding, hard tire.
You’ll also get more grip in the corners. If you ride in wet weather, slightly less pressure would also be prudent to improve traction.
Off Road Tire Pressure
Your bike will feel more comfortable with the correct tire pressure when off-roading. Like traction, this performance quality improves with lower pressure. The comfort afforded by lower pressure can be noticed on all of your bike’s touchpoints, from your feet to your saddle to your hands and shoulders.
There is a limit to how soft we’d want our tires to be, though. We love the increased traction that comes with low PSI, but eventually, a tire gets so soft that it has too much rolling resistance, making our bike feel slow. This will be most noticeable on hard, smooth surfaces like pavement. Too-low tire pressure can also hamper bike handling by making the front end resistant to steering input or causing the tire to roll excessively on the rim during cornering.
Enduro Mountain Bike Tire Pressure
For Enduro MTB, the first step you can take toward totally geeking out on tire pressure is to adjust your PSI mid-ride to tinker with how your bike feels. This is something that’s most applicable to mountain, gravel, or cyclocross riding, but there’s always a chance you might encounter a surprise rain shower on a road ride that will necessitate a little less pressure.
It’s always easier to take air out of your tires during a ride than to add air back.
When in doubt, start a ride on the high end of the PSI scale and let out air little by little, going off of feel. See if you can notice an improvement in traction. Be careful not to take too much out if you’re riding rough trails.
Mountain bikers often like to run slightly less pressure in their front tires, and that’s something you can experiment with too. The idea is that, due to body position, you have less weight on the front tire, so you can get away with lower PSI, thereby enjoying more traction for cornering. With more air volume in a 2.2-2.5-inch mountain bike tire, pressure can be fine-tuned with great effect.
Mountain Bike Tire Pressure For Road Riding
For road riding MTB, your tire pressure is all about balance. You might be the type to tinker with your PSI, or you might prefer the set-it-and-forget-it approach. Either is fine if you have a grasp of the fundamental balancing act that goes into deciding on how much to pump up your tires.
You find that balance point by going low enough to maximize traction and comfort without risking flat tires or sacrificing rolling resistance and handling. Compared to most vehicles, a rider on a bike is very lightweight and slow-moving, making the correct tire pressure far more important from a performance standpoint. Remember, air is free, so make sure to use it to your advantage whenever you’re headed out for a ride
MTB XC Tire Pressure
For XC, I would set the pressure as low as possible. I’d start at the lowest recommended pressure (as printed on the tire) and see if you get a pinch flat (small holes on both sides of the tube where it contacts the rim). If so, put in a few more psi and run that. If you don’t get a pinch flat, run a few psi lower until you do pinch flat.
Tire pressure is an individual thing. You may also play with the pressure to see how it affects handling, traction, and rolling-resistance.
Mountain Bike Tire Pressure Rider Weight
The more you weigh, the more pressure you are putting down on the tires of your bike. This weight pushing down means that you will need to have a higher amount of air pressure in the tires in order to hold up your weight.
If you hit a bump too hard with an amount of pressure that is too low for your weight, then the rim of your wheel can hit the obstruction. This is bad for your rim to have to deal with and it can bend, bend, or otherwise damage your rims.
If you are doing jumps or are riding down a trail that has a drop of any kind, then you really have to watch your psi and make sure that it is not too low or you risk damaging your rim. Sometimes your rim can even fold and form a taco shape. At the same, if your tire pressure is too high then when you land on it you risk bursting your tire if you are on the heavier side.
This is why getting the right psi is all about balance, just as you have to balance yourself on those two wheels of your bike. Keeping your weight in mind also applies if you are bikepacking and have bags and extra things on your bike. This added weight should be taken into consideration and your psi levels raised accordingly.
Specialized Mountain Bike Tire Pressure
Running the correct tire pressure is crucial for a controlled and enjoyable ride. What you’ll see below in the following sections is a recommendation of a starting point or a “ballpark” tire pressure based on rider weight and tire size. Your preferred tire pressure may vary according to load, terrain, conditions, and ride style. Front tires can be inflated with less pressure than rear tires.
You’ll also see a decal on your wheels indicating maximum inflation pressure–never exceed the maximum inflation pressure of your tires or rims. Enjoy your ride.
Note that extra wide tires generally require wider rims. Generally speaking, lower tire pressures provide better control on wet or loose terrain, as well as a smoother ride. Higher tire pressures provide better puncture protection. Check your tires frequently to ensure your tire pressure is in the appropriate range.
Maxxis Ardent Tire Pressure
One thing to remember is that your tires are also part of your suspension. Your tires are also your only contact with the trail, so it is very important to figure out your pressure range to get the best performance and comfort.
Lower volume tires (1.8-2.1) need higher pressures while high volume tires (2.2+) need lower.
Thicker sidewall (heavier) tires ride better with lower pressures than higher. Tubeless setups run lower pressures than tubed.
While these “rules” create a great starting point, it is always important to remember that results vary based on riding style, tire brand and trail conditions. Once you find your optimal + 5 psi range, you can adjust to the trail conditions easily and quickly.
Ideally, you want to run the lowest pressures that you can get away with without pinch flatting. Using the list above as a gauge, start with a high pressure (around 45 psi) using a floor pump. Use this same floor pump throughout the test. Ride at this tire pressure for a while on the trail and observe the results. Now, go back to the car and lower the pressure 5 psi. Repeat the same process observing the results.
Cannondale Tire Pressure
With Cannondales, having the right PSI in your bike tires can make a world of difference.
However, it would be an oversimplification to say that less air offers a more comfortable ride and more air makes you go faster. While this is true in many instances, the fact of the matter is that proper inflation for optimal performance depends on the individual rider and his or her bike.
Every tire has a recommended psi printed on its side close to where it touches the rim. This is usually written as a range (for instance, “90 to 115 psi”) since there are reasons why you’d want to be on the higher or lower end, which we’ll get into shortly. Basic rule of thumb if your tires happen to not indicate a recommended pressure: pump them up until they’re firm but still slightly squeezable.
Alternatively, there are generally-accepted ranges based on bike type.
Unlike roadies, mountain bikes are flying over loose, bumpy terrain. Tires with too much air lead to too much bounce, making for a jolty ride. Lower pressure helps with shock absorption while also giving you more traction since more of the tire comes into contact with the ground. MTB manufacturers recommend between 30 and 50 psi on most of their bikes since this is a nice balance between on-road (closer to 50) and off-road (closer to 30) riding.
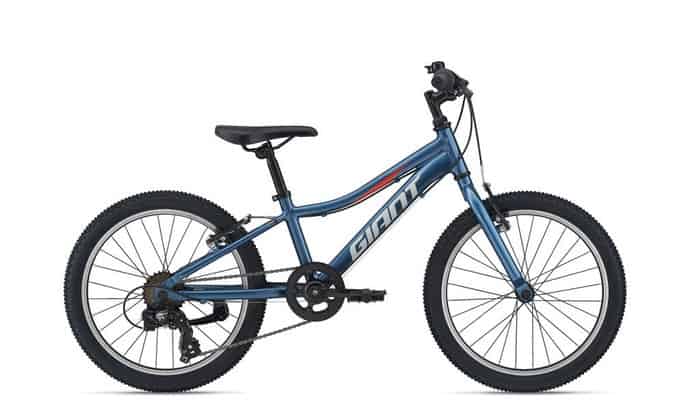
Tire Pressure For Giant Bikes
Appropriately inflated tires conform better to imperfections in the road, absorbing impacts and allowing you to ride faster with more comfort and control. As mountain bikers have known for a long time, tires that are inflated to a higher pressure than necessary for the terrain transmit more impacts and sacrifice speed as well as energy as the rider fights to keep the bike on track and to stop it from deflecting off obstacles, however small, in its path.
Therefore, alter your tire pressure based on the surface you’re riding on.
Conventional road wisdom has always held that 100 psi (6.9 bar), more or less, is the magic number for speed and compliance, and on brand-new smooth pavement or at the track, your tires could feel greatly inflated to that pressure.
However, when riding on anything other than a perfectly smooth surface (which, if we’re honest, is what most of us ride on most of the time), we recommend taking advantage of the benefits of tubeless and hookless technology and going with 10-15 psi / 0.7-1.0 bar less than what you might have normally put in (around 85-90 psi / 5.9-6.2 bar in the case of 100 psi / 6.9 bar mentioned above, for example).
This allows the tire to conform better to imperfections in the road, reducing deflection and wasted energy as well as eliminating a harsh, chattery ride feel. Likewise, in wet conditions, just 10 psi / 0.7 bar less than what you usually might run will give you an increased contact patch and much better grip.
Adjust your tire pressure according to the volume of the tire you’re using.
90 psi / 6.2 bar could be perfect for your weight and the road surface when you’re on 25c tires, but if you decide to swap out to wider 28c tires, you’ll be increasing tire volume significantly, which means if you want the same smooth and supple ride quality from your new tire size, you’ll have to adjust air pressure downward to accommodate.
Adjust your tire pressure based on your weight as well.
Tires support the weight of the rider plus the bike plus any luggage or gear; for this reason, heavier riders require more pressure and lighter riders require less. As such, it’s essential to adjust your tire pressure according to your weight rather than try to use a “one pressure fits all” measurement (like the magic 100 psi / 6.9 bar we mention above).
Never inflate over the maximum tire pressure indicated on the rim, the tire and /or the rim tape:
To make sure every ride is safe, Giant provides a recommended maximum (MAX) tire pressure, indicated either on the rim, the tire or the rim tape. You should never inflate your tire beyond that pressure.
Maximum tire pressure is NOT the recommended tire pressure.
To make sure every ride is great, Giant recommends that you never inflate your tires up to the maximum pressure either. Inflating to maximum pressure is unnecessary and for the reasons discussed above can give a harsh, unpleasant and potentially dangerous ride experience.
Check your tire pressure before every ride as well.
This goes all the way back to the beginning: Appropriately inflated tires conform better to imperfections in the road, absorbing impacts and allowing you to ride more efficiently and safely with more comfort and control. A one minute pressure check before each ride to ensure your tires are appropriately inflated can make all the difference!
Trek Mountain Bike Tire Pressure
For Trek mountain bikes, the easiest way to keep your bicycle running well is checking tire pressure before every ride. Properly inflated tires ride great, last long and resist flats. Plus, keeping the tires pumped prevents wheel damage should you hit a rock or pothole while riding. Bent wheels hinder braking and cost a pretty penny to repair.
Fortunately, checking tire inflation is simple once you have the only tool required: a bicycle tire pump (don’t use your local gas station pressure hose because it can overinflate and damage tires). Bike shops sell quality pumps for your car that will work if it reaches sufficient pressures.
It’s best if your pump fits both bicycle valves. How do you know how much air to put in your tires? On most tires, the recommended pressure is printed on the sidewall. It’s often written as a range, such as “90 to 115 psi (pounds per square inch),” which appears on some high-pressure road tires. You can experiment within this range to find what feels best for you. Less pressure offers a more comfortable ride and more air means less rolling resistance.
Many riders opt for the best of both worlds and run 100 to 105 psi in their skinny road tires. Inflating a tire is as simple as attaching the pump head to the valve and pumping. You’ll need to unscrew and remove the valve caps first if your tubes have them.
And, if you have Presta valves (they have a knurled tip and are also called “French” valves), you’ll need to open the valve by unscrewing and depressing the tip just long enough to let a tiny amount of air out (remember to close it after pumping, too).
Then, attach the pump and start stroking, stopping when the gauge shows that you’ve reached the recommended pressure.