
 It’s not that easy to just go and ride trails during winter. In places where winters are mild, it’s pretty much the case of having few windproof clothing pieces. However, not all places are like that. Where your trails are more rugged, you will definitely need to winterize your mountain bike.
In some places, winters can have very cold winds and lots of snow. This may be demotivating for most people, especially for trail riding. Even people who want to avoid the trails and keep riding on the road during winter months tend to be discouraged by freezing weather.
Snow can be tricky, but wet and muddy conditions are even worse for the bike. You need to take care of your bike properly because, unlike the summer weather, winter conditions are not as forgiving for not caring about the state of your bike.
There should be no reason stopping you from riding in the winter, and I will tell you everything you need to know about riding safety, bike maintenance, and how to winterize your mountain bike during those months.
Let’s start with things most people can’t do by themselves. Luckily, for most, these are mostly needed only once at the start of winter.
Mountain Bike Service and Greasing
The first thing that anyone would suggest is doing a complete bike service with the winter months closely coming up. Especially so, if you are not doing regular maintenance like lubing and adjusting components.
Most likely you will find worn out parts like your chain and brake pads, which is not something you want to have in wet and freezing conditions.
If you can change and maintain these without bike shop service then your bike should be in perfect condition 365 days a year. However, October or November is a good time to take your bike apart and service every moving part.
Regular service will take care of 99% of problems that may occur but there is more than that to take care of. Most of moving parts and greased surfaces are hidden. We usually detect that something is wrong when the damage has already been done and it’s too late to just do quick maintenance.
I have a habit of taking every bearing out and greasing everything. If there are sealed ring bearings then it’s good to grease the inside ring and the outside ring just a bit.
The other things I grease before winter are pedals and seat post. It will create a grease barrier that blocks water from coming inside the seat tube. Be careful with the seat post though, if you have a carbon frame you should use carbon assembly paste, like Park Tool Supergrip Carbon and Alloy Assembly Compound which works with alloy as well.
Derailleur Cables
Not something that’s usually done, but a great thing to do nonetheless, is putting a bit of Muc Off Bio Grease or Muc Off Bio Dry Lube on the cables.
It’s not, however, recommended to have greased cables in dry and dusty conditions because dry dust will stick to them and may cause shifting problems. It’s much better to use dry conditions chain lube so it won’t stick dust and dirt to it.
In humid weather when the ground is more wet than dry all the time, any grease or lube protects cables from rusting.
Keep Your Bike Clean
Keeping your bike clean is the key thing to do regularly in the winter.
Any dirt or mud that stays on the bike won’t dry as fast as we would like in cold weather. It will start to corrode any metal part on your bike. And even most people think it’s fine if it’s aluminum, it’s not, aluminum corrodes as well. You will notice thick white paste appearing and later it hardens up. If it appears once it won’t do too much damage, but it can actually break any aluminum part if it happens continuously.
Unlike iron and steel which lose structural strength, aluminum will deform its surface and structure. Then it will start to bend a little and break. I lost one frame to that exact thing.
After proper cleaning, you should always use water dispenser on any part that you can’t physically dry out. My favorite is Muc Off Bike Protect. Be careful though, most water dispensers have lubricants in them and you should never use them near any braking surface. So even if you are unable to physically dry brake clips and rotors, you are better off just letting it be.
However, there is a solution for that as well. Blow some air with an air pump to dry them out and it will be just fine. Brake clips themselves are lubed with braking oil on the inside if they are set up properly so water won’t be able to cause rusting inside. All you need to do is dry out the brake pads and rotors with air.
Chain Lube for Wet Conditions
It shouldn’t even be necessary to mention that reapplying lube after each cleaning is a must. Sadly though, there are still people out there who don’t even care about it.
But, which lube is good for winter?
Chain lubes specs are like a spectrum with wet and dry weather conditions being on the far ends of it.
You will often hear comments like, “they are just trying to take your money” or “just use any lube and you will be fine”. But it’s not really that simple.
Dry lube has a lower viscosity which prevents most of the dust from sticking to chain and other drivetrain components and causing unnecessary wear. In order to do that, they had to sacrifice the ability to repel water. Dry lube is easily washed away with water, and even only humid weather can slowly dissolve and remove it from key parts by friction.
This is not something that manufacturers did to take your money, it’s how the physics of viscosity work.
On the other hand, wet lube will stick more dust to itself but it’s very hard to dissolve in water, making it perfect for snow, rain, or any other weather condition in which the ground isn’t dry.
There are lubes that partially cover both weather conditions. All I can say about them is, I’ve never seen one that works well.
It’s best to have both types and switch between different weather conditions. After all, quick chain cleaning and reapplying lube takes about 10 minutes. It will save you money and headache in the long run.
Other Parts to Lube
Derailleur
A bicycle chain isn’t the only part that can benefit from occasional lubing.
There are products specifically designed for protecting bicycle parts. My personal favorite is Muc Off Bike Protect. Every time I wash my bike it’s the first thing that I use.
First, I start off by spraying a bit on the frame. Although, not on the back triangle or lower parts of the fork because I don’t even want to risk it coming near my brakes and rotors. You should be careful with tires as well, they can be slippery for a period of time if sprayed with it.
Then I spray the whole derailleur, front one as well if you have it. I usually take them off the bike to avoid spraying other parts, but you can just cover the parts around it with a bit of paper.
After it gets dry, the coating will protect the derailleur from acquiring mud but this alone won’t make it smooth if the grease has been washed away from moving parts. You need to put some grease inside those moving parts or it will start to squeak and even get damaged long term. This won’t be necessary so often because it’s not that easy to wash the grease away from a derailleur.
Spoke Nipples
Spoke nipples, for example, can corrode easily during winter. Wheels will usually get covered in mud and water and spoke holes are tough to clean and dry out. When they corrode it becomes impossible to center the wheels without breaking a few spokes. A completely unnecessary issue that causes headache, especially, if you are running tubeless tires.
A very small amount of wet chain lube can create a coating on them and protect them from corroding. Or you can use the same Bike Protect by Muc Off I mentioned above.
If by any chance you are still running older MTB with rim brakes, avoid lubing spokes altogether.
Suspension
The last and probably the most important is a fork suspension. Fork stanchions can get scratched by dirt and then damage dust caps. If the dust, mud, and water then freely get in, your fork won’t last. Same goes for a rear suspension as well. Muc Off Bike Protect is perfect for this, your suspension will be smoother than ever. Don’t overlook this key step to winterize your mountain bike.
Lower Tire Pressure
Most of you know this but you can run much lower pressure on your tires than what manufacturer instructs. That number that’s written on the tire wall is just a safety minimum so manufacturers can have an excuse if the tire gets damaged. However, it never happens because of low pressure, unless you go too low.
Lower pressure will greatly increase the grip in slippery conditions because the tire bends more and creates a larger and more flexible contact surface.
I used to run 7-10 psi under the manufacturer-advised minimum when running with tubes. Tubes are easier to snap so you can’t go too low.
These days, I can’t live without tubeless tires and their advantages. With tubeless, I can easily run 15-25 lower than the manufacturer instructed as a minimum. Usually, it ends up being 22-25 psi on an average 2.4-inch tire. And that’s what I run all year round. Gives me great grip in winter conditions.
However, a lot of grip properties still depend on the tire model itself.
Invest in Mud Tires
There are lots of tire types for specific riding surfaces. Tires for loose terrain are commonly used as a trail, enduro, or downhill tires with a bit different grip to rolling resistance ratio. They are great for overall grip and will do just fine for all year round with adjusted tire pressure.
If you want the best for wet conditions and even snow, there are specific tires that have amazing grip in the mud. Depends on the type of weather where you are riding. Winters in my area have different dry and wet periods of over 20 days so I switch different tires sometimes.
Some manufacturers make their loose terrain trail or enduro tires for mud as well, but I like loose terrain ones better and avoid the mud.
Riding in Snow
Riding in snow is a completely different category. Not only that, but there are two different snow categories. Some of us learned this the hard way.
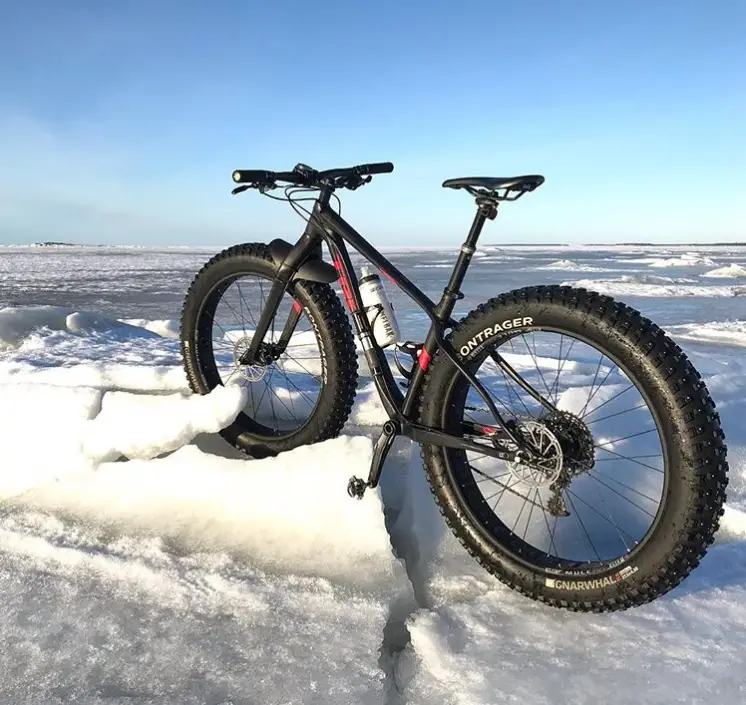
What I’m talking about is that deep and shallow snow are opposites in some regards. Deep snow requires fat tires for maximum contact surface. There are fat bikes made specifically for that, but they never have the performance of normal mountain bikes.
If you have enough money I would advise having a fat bike because riding in deep snow is fun. It’s like a completely different sport.
The snow that barely covers the ground, on the other hand, requires thinner tires. I would go 2.5-inch maximum with the best grip possible. The reason why these work better in shallow snow is that they can go through the snow and reach the ground beneath. Fat tires will still perform great, but this is a chance to keep riding your full or hardtail in the snow.
Protect Yourself From Dirt
There is some really useful stuff you can put on your bike for winter riding as well.
Mudguards and fenders are amazing additions to have on a mountain bike in the winter. Mudguards are best used when there is thick mud on a trail. It sticks to a tire and flies off at a more vertical position in wheel rotation. That’s why a small mudguard is more than enough to protect your face and more importantly, fork stanchions from the mud. I’m liking the All Mountain Style Front Mudguard for most purposes.
Fenders, however, are better used when the ground is looser and less wet. It flies off a tire in a similar way as dry dirt. For this reason, you need something that covers a bigger surface than a mudguard would.
Shorter Days During Winter
As days get shorter in the winter there will be less and less time to ride. Especially, if you are working a day job. It’s not a reason not to keep riding but it may discourage some riders.
A decent set of lights is a good start. You will find that riding at nights can be amazing. Don’t do it alone, of course, trails will be empty and you need someone in case anything happens.
I suggest having both a helmet and a handlebar light. That way you can keep watching the trail right in front, and what’s happening in the distance, at the same time. Lights should be about 500+ lumen. But don’t get fooled by cheap lights online that claim to be much more powerful than they actually are.
See the whole article about night riding here – link.
Final Thoughts on How to Winterize Your Mountain Bike
Don’t stop riding just because it’s winter. I’ve seen countless riders quit and go out of shape forever, by skipping riding in winter. Then it prolongs to spring because they find other activities and they never get back to mountain biking.
Just remember to take care of your bike and give it some love from time to time. Every buck you invest in better parts for winter will be worth it.
Dress for winter, eat well, and hit those trails!