
 Internally routing a dropper post can be a real bear of a task, as I found out myself. Some time ago when the only bike I had was my XC hardtail, I used to hear from people that a dropper post would be useless for me. And I listened because I didn’t know much about anything at that point. So imagine my surprise when I bought my first trail bike with a dropper post. It turned out that it is my favorite feature on any type of bike. It’s useful even on a cross-country bike, especially for recreational use, which actually applies to most XC riders.
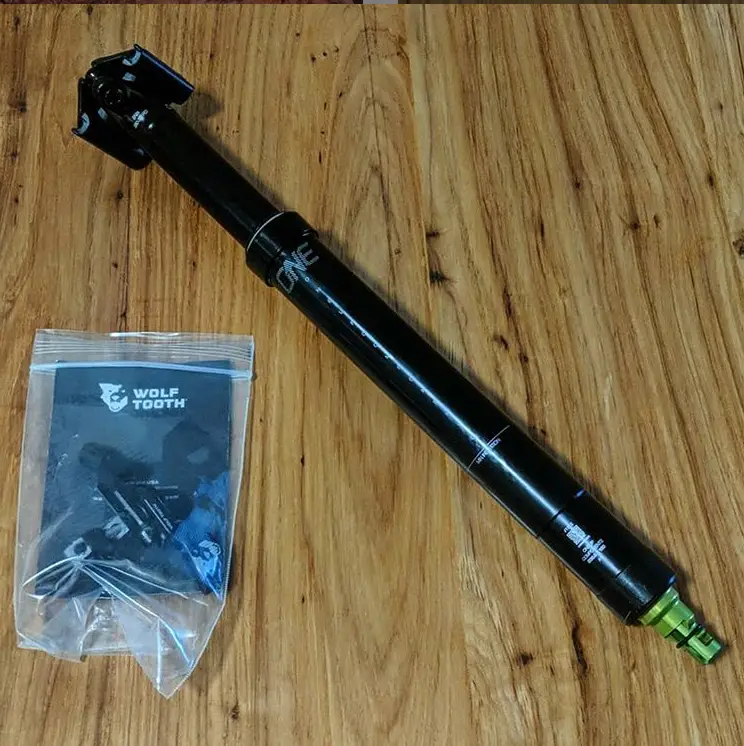
Since it came pre-routed on my trail/enduro bikes, the first time I actually had to do this by myself was when I decided to route it through the frame of my cross-country hardtail.
Different Dropper Posts
What’s relevant for this conversation is how a dropper post is activated. There are three types, mechanical, hydraulic, and electric dropper post.
Mechanical ones use a cable to pull the lever which activates the dropper post. This article is mostly about mechanical dropper posts because they are the most common out there.
Hydraulic dropper posts use oil same as hydraulic brakes. The fact is these cable routing tips and tricks apply to hydraulic dropper posts as well. To route a hydraulic hose you need to pull it through with an already routed cable.
Electric ones are made wireless. There is only one model on the market at this point and it is Magura Vyron wireless dropper post.
Different Frame Types
There are frames that have internal routing for a dropper post only through the seat tube, but this wasn’t one of those. I was actually glad it wasn’t because it looks a lot better this way, but as you can expect, it’s a pain to install.
Some manufacturers also add guiding tubes through their frames for easier routing. However, those are quite rare. No one is particularly fond of that added weight.
I could’ve gone to a bike shop and have someone more experienced do it for me, but I’ve decided to try my own luck. Luckily I worked at the bike shop and I’ve seen other mechanics struggle with it so I knew exactly what to expect.
Turns out, it’s not that difficult if you can predict everything that can go wrong in the process. That is after you get angry a few times because you have no idea how and where the cable got stuck inside the down tube.
I’ve done it multiple times since then, and it gets really easy after first few tries. I’ve decided to share some tips that can save you from wasting time and keep the frustration at bay.
10 Tips on Internally Routing Your Dropper Post
1. Route The Cable First
The only way I’ve ever seen, and probably the only way possible is to route a cable first and then use it to lead the cable housing through.
Usually, it’s easy to use the dropper cable itself, but sometimes it gets tricky to control it when you start to lead the housing. Most likely you won’t be able to hold the cable’s end it might get pushed and twisted inside. Getting stuck like that is annoying so I used to add some oil in the housing to smooth it out.
Nowadays, I’m using a separate cable which is very long. Long enough to let me guide the housing through while keeping the cable ends pulled so it stays tight. The other end I simply tie to the handlebar, if necessary.
Once the housing is routed, I can pull this spare cable out and insert a new dropper cable inside. By this point, the process is almost complete. To cut the housing and cable to a proper length you should always use the manufacturer’s instructions.
For hydraulic dropper posts use the cable end cap and partially stick it inside the hose. It’s a good idea to tape it a bit as well so it doesn’t come loose. Then simply use the cable to slowly pull the hydraulic hose through the frame.
If the hose is pre-bled simply tape it really good to the cable but make sure to smoothen the edges a bit with the tape so it doesn’t get stuck on those.
2. Take The Bottom Bracket Out
Not every frame requires this, some make it easy to twist and turn the cable and housing around there and some don’t.
I’ve found it to be a good thing to do no matter how the frame is built. This way it’s easier to make sure the cables are properly routed and not twisted somewhere inside.
Some of you might not have the tools or knowledge to do this, so if it’s not required on your frame maybe it’s best not to mess around with it. However, if you are taking the bottom bracket out, make sure you properly grease everything before putting it back.
The only time you should avoid taking the bottom bracket out is if it is a press-fitted one. Simply because unless you know exactly how to do it, you can easily damage the bearings or the frame. It requires a proper tool, technique, and experience.
3. Avoid Tangling With Shifter Cables
One time I’ve routed it quickly without taking the bottom bracket off, only to find that when I shift my rear derailleur the dropper post gets activated. Sound weird but it’s a common problem if you are not aware of the possibility.
If you are simply pushing the cable through it’s easy to tangle it with the already routed shifter cable. The easy way to check if that happened is to try shifting gears after you routed the dropper cable through and see if there is any tension on the dropper cable. If there is moving tension on a dropper cable while shifting gears then it’s tangled and you need to do it all over again. It’s better to check for it at that point than routing the housing and set it all up and then finding out that you’ve made a mistake.
That’s one of the reasons why I recommend taking the bottom bracket out, makes it much easier to avoid tangling.
4. Cable Is Getting Stuck
I’ve found that different frame manufacturers may leave a frame smooth or rough on the inside. When manufacturing a frame, they use bladders and depending on their bladder control there might be some rough patches or frame pieces sticking out that will block the cable from going through.
In this case, I try to push the cable by quick stabbing motion while twisting it at the same time. This will quickly push and twist the cable end and it should go around whatever is blocking it. However, if it is the shifter housing that’s blocking it then you might end up with a problem I described in a previous section.
5. Using Air Pressure
This trick is useful if you are not taking the bottom bracket out.
If you have a compressor you can seal all the holes in the frame except the two you are trying to route through. Then when you insert the cable you can start blowing air in that hole and slowly push the cable inside. The air should exit on the opposite hole if you sealed everything off properly. That airstream will help guide the cable end through. It’s especially helpful around the bottom bracket part.
It’s necessary to use a compressor because the airstream has to be continuous. To seal the holes some duct tape should be more than enough since you shouldn’t need too much air pressure anyway.
6. Using Vacuum
This is the same trick as with a compressor but from the opposite end.
Since not many people have an air compressor at their disposal, the vacuum might be a better idea. Most vacuum cleaners are powerful enough to do this. This way it requires a bit more power than with the air pressure. It’s easy to keep the airstream along the cable line with air pressure but with vacuum, you need more power to lift the cable end and pull it in a direction you want.
The procedure is similar, seal every other hole and proceed by slowly pushing the cable inside while vacuuming the opposite frame hole.
7. Using Magnets – The Best Way
Using two opposite magnets might be the best tip I’ve ever got. You can do this if your frame is made out of aluminum or carbon.
They need to be of opposite polarity because you want them to stick together. One of them should be small enough to go through the frame hole. I tape the smaller one to the cable’s end but tape it well, because it’s hard to pull it out if it gets loose inside. Then when the cable and the magnet are inside I use the other magnet, which is preferably a stronger one, to stick them together through the frame. You should hear a click when they connect.
This allows me to lead the cable through and find the passage where it won’t get tangled with anything. You should check for tangling anyway later.
Park Tool has an amazing cable internal routing kit that works with magnets.
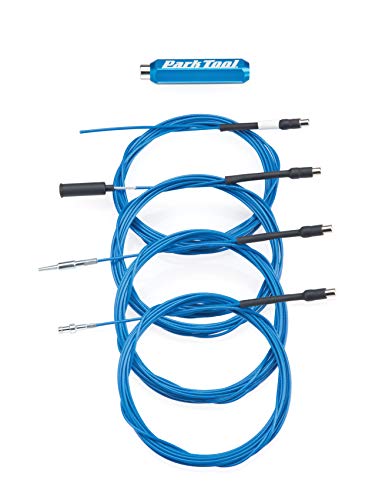
I’ve had the opportunity to work with it once and it’s perfect because it’s hard to find the frame fitting magnet otherwise. The only reason I don’t own this kit at the moment is because of my old custom kit with the cable and magnets is still doing the job.
8. Cable End Cap And A Hook
If you want to try your luck using a shortcut for a quick routing, you might want to squeeze the cable end cap to the end of the cable and then push and twist it to the bottom bracket. Once you are there you can use a hook made of hard wire to pull the cable around and up by hooking the end cap.
Worked for me once to quickly route the dropper but it can cause lots of problems. I recommend at least taking the bottom bracket out if this is the method you are choosing. Might save you even more time because you will avoid tangling.
9. Housing Length Problems
As I mentioned already, you should always follow the manufacturer’s guidelines to cut housing and a cable to the proper length.
However, there are situations where the housing length may depend on the frame. Some manufacturers don’t predict this in their instructions.
The situation I’m talking about is when the dropper handle is on the opposite side from the hole on the frame through which the housing is routed. This will cause cable tension when you turn the handlebars to the side where the dropper handle is. It has to go around the head tube and that is where the tension happens.
In this scenario, you should leave the cable housing a bit longer on the front side so it has enough length to freely go around a head tube. You can tighten the handle and test this before cutting the housing and the cable.
10. Changing an Already Routed Cable
Changing only the cable is easy because all you need to do is pull the old cable out and insert a new one. But changing the housing as well would require repeating the whole routing procedure. Unless you do this.
First, pull the housing out and leave the old cable inside. Then simply tape the new cable to the old one and pull it through. This way, the old cable will lead the new one through and you will save yourself a massive amount of time.
If the cable end can’t go through the frame hole, you might need a spare cable. First, pull that spare cable from the opposite side through the seat tube. Then use that spare cable to tape the new one and pull it from the front. Still simple just one more pull with a third cable.
Then you can continue routing the housing on a new cable.
Wrapping Up
I’ve spent a lot of time searching and asking on forums when I needed these tips for the first time. My hope is that this will be helpful to all of you who are experiencing these problems while internally routing a dropper post.