
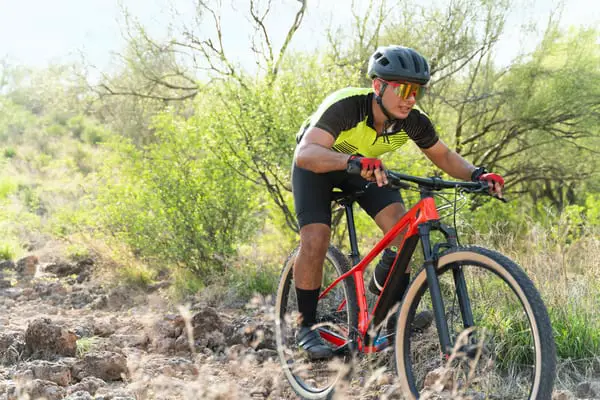
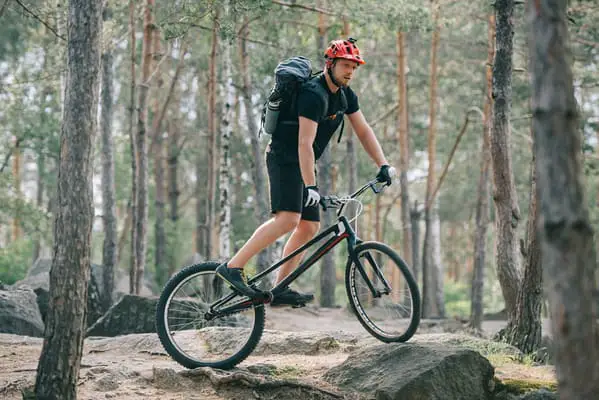
The sport of mountain biking is not just something that a person can casually engage with. It takes lots of practice and a mastery of MTB skills to become successful. Everything from the diet that you eat and the amount of physical activity you get in a day, to the tips needed to ride smoothly and efficiently is important when improving MTB skills. Since there is so much opinionated information out there, just how can you improve your MTB skills?
To improve your mountain biking skills, make sure you are confident in your decision to ride for yourself and only you. Focus on riding smoothly and practice things like berms, rolls, and jumps slowly and methodically until you master the skills. Eat healthily and get plenty of rest.
There is not one set formula for immediately becoming great at mountain biking. It is a learned process that requires repetition and discipline to advance to professional levels of smooth and efficient mountain biking. In this guide, we are going to take an in-depth look at everything you need to know to improve your mountain biking skills. Read on to find out what to focus on and what to ignore to get the results you want.
How To Practice Mountain Biking
It takes perseverance and a strong commitment to the sport when practicing to improve your MTB skills. It takes time to build up stamina for mountain biking. Unless you simply take your mountain bike out for an occasional ride along trails in the outdoors, with no intensity, you will have to build stamina for this activity–certainly for the sport of MTB.
To build stamina, you will always want to give yourself a solid warm-up. If you try and go hard straight away, your ride will probably end up being cut short due to the severe exhaustion that can set in. Give yourself about 10 minutes to ride at a steady pace on solid ground before you dive into some of the rougher types of terrain on your chosen MTB path.
It is also important to never stop during your ride. While it is certainly tempting to stop at the top of every climb you meet, try not to do this no matter how tired you may feel. It is important to keep your heart rate up for the whole ride. You don’t necessarily need a heart rate monitor for this as you can get a general feel for this the more you ride.
It is also important to try changing your cadence as much as you can. The key is to try and get away from your natural cadence after a week or two of mountain biking as this can allow you to slowly but surely increase your stamina. Consider walking back to your car once you reach the end of your trail, or even practice carrying your mountain bike back to your vehicle. Basically, anything that keeps the strength training going after the ride can increase cadence.
Ways to Effectively Practice for MTB to Ensure Improved Skills
To shake off your MTB fears, it is important to try and change up the sort of riding that you do. If you normally only do one or two-hour trail center types of rides, challenge yourself to go even further. One way to do this would be to try a cross-country ride that lasts for about 3-5 hours to see just how far you can last in this advanced type of MTB. Never give up on increasing your stamina by starting slow in the more advanced type of rides to stop feeling afraid.
Sooner or later, the advanced riding will start to feel normal–not scary, and then you can try the next challenge.
Speaking of challenges, you should never stop trying to challenge yourself. A great way to do this would be to challenge yourself to ride up short steep climbs. This can be really good for your fitness because you’re putting in a really hard, short sharp effort, but also really good for your skills by trying to get up a climb without worrying about falling.
You can also consider timing yourself. You can use a device like Strava or something similar to keep track of how long it is taking you to traverse a path or a climb. Timing yourself can help you maintain endurance when you are feeling really tired and feel like you cannot go any harder. Always follow the time to ensure you complete the task you set out to do.
You can also try and build interval sessions into a normal trail ride. Depending on how big the hill or slope is that you need to get up, you can practice interval training on short climbs to build your stamina in interval training. Consider timing the intervals in one-minute bursts in sessions of 5 intervals. The more you build up to an MTB challenge, the more experience you gain in the activity, and this translates to a lessening of fear.
It goes without saying that one of the best ways to increase your stamina with MTB is to ride often. Try to ride your mountain bike 3 to 4 times per week and do not ride until you injure yourself or need a long recovery after an intense ride. Vary your efforts across these 3 to 4 rides per week and focus on sprint intervals and maintain a good average heart rate the entire time.
Lastly, it is important to stretch before and after a hard ride. This can really help keep away any aches and pains that can occur from even low-intensity bike rides. If you regularly feel pain or aches after an activity like MTB, it will be natural for you to fear the activity again. Always stretch to alert your body that the activity is okay.
What To Eat Before Mountain Biking
Nutrition is an important aspect of any top level sport, but even to the casual athlete, diet and what and when you consume can have a big impact on your performance and enjoyment during rides, as well as your recovery after. There are however, different approaches you may want to take regarding what ‘discipline’ you do most of the time.
This can be none more important than when you are trying to improve your MTB skills. MTB riding for a whole summer or season, almost every day on end, can take its toll on your energy levels, so making some small differences to your diet can affect your performance. This helps you minimize burnout/fatigue, feel more energetic, which ultimately means you’ll enjoy it more and give more to your skill set improvement.
Carbs (or more specifically glycogen) in muscles, provides the largest and most ready supply of energy to fuel muscles during exercise, and are depleted and replenished easily. You can split them up into simple and complex. Simple carbohydrates are basically sugar (glucose), like you can find in fruit. Complex carbs are starchy foods like root vegetables, cereal, bread, pasta, rice etc.
Protein is the building blocks for muscle and enzymes in the body, so it is vital to make sure you eat enough protein to ensure you build muscle properly. However, you may not need to supplement your intake by taking extra protein. Eating a balanced diet already provides the required amount of protein for muscle/enzyme repair. Unless you are wanting to build mass, you don’t really need to increase your intake for MTB.
However, it is helpful to make sure you have a balanced portion of carbs to protein (3:1 or 4:1) in the 24 hours after a long ride to replenish and repair your muscles. Contrary to popular belief, we do need fat in our diet. It is an important component in all body cells, as well as providing a source of energy and makes up some substances in the body (such as hormones).
However, we do not need much in our diet to provide for these needs. Low fat foods can help the digestion process and help us to absorb other foods. Trying to minimize fat intake can be detrimental to performance.

What To Eat After Mountain Biking
Whether you’re a beginner or a seasoned endurance athlete, MTB riders need to know how to optimize recovery. Endurance athletes have a 30-minute recovery window post-workout for replenishing the glycogen stores depleted by a hard workout. So instead of lounging around in your chamois sipping a soda, here’s how you can optimize your recovery after a hard ride.
One of the first things a MTB rider should do, at least within half an hour after their ride, is eat: between 100 and 300 calories in a mix of carbs and protein (about 3:1 or 4:1 carbs to protein). Consuming a carbohydrate-rich snack within 30 minutes after your workout will dramatically improve your recovery, decreasing muscle soreness so you can get on with your day, and also be ready for your next ride.
When you ride hard or long, you sustain tiny tears to your muscles. Your metabolic rate remains elevated for about 30 minutes afterwards, which speeds muscle repair. After that, your muscles will be much slower to recover without proper nutrition.
A little protein is recommended, since it will help kick-start the muscle-repair process, but too much could interfere with the body’s absorption of carbohydrate. Some recovery drinks can be helpful for replacing carbs, especially if you don’t always feel like eating right after a long ride. Just read the label to make sure they’re not loaded with refined sugar.
What Gears To Use Mountain Biking
Let’s talk about MTB gears. You should always check that your gears are working properly. If the chain falls off the chainwheel, if the rear mechanism touches the spokes, or if the chain does not engage the sprockets properly when you change gear, you (or a bike mechanic) must make suitable adjustments and replace any worn parts.
If the chain slips, especially when you pedal harder, you will probably need to replace the sprockets on the back wheel and fit a new chain.
Make sure that you are familiar with operating the gear shifters. The right-hand lever operates the rear gear (moving the chain across the sprockets). The left-hand lever operates the front mechanism, which shifts the chain from one chainwheel to another. When the chain is on the big chainwheel you will be in a bigger gear, usually used for riding along the flat or downhill.
The smaller (inner) chain wheels are used for uphill work, riding with luggage, or into a strong headwind, or perhaps around town when you need a low gear to cope with lots of stopping and starting at traffic lights or junctions. Whether you ride on the roads or on trails your gear changing has to be instinctive to avoid any problems with traffic or technical terrain.
You may find it beneficial to practice gear changing on a quiet road or simple trail before tackling more difficult conditions.
The derailleur mechanism requires you to keep pedaling to get the chain to shift from one sprocket (or chainwheel) to the next. Depending on the size (number of teeth) of the chainwheels and the sprockets there will be some overlap of gear sizes between the different chainwheels.
Whichever chainwheel you use you should spend most of your riding time using the middle three or four sprockets except for more extreme circumstances (steep climbs, flat roads with a tailwind etc). Look ahead (not down at your gears).
Knowing Your Gears Improves Your Technique
MTB cyclists tend to pedal at about 90-100 revolutions per minute, as this is most efficient in terms of aerobic capacity and power. Off-road or leisure cyclists usually pedal at a lower cadence, perhaps closer to 70-80 rpm; riding off-road or uphill will inevitably lower your cadence but aim to keep it above 60 rpm at all times. Using your gears enables you to maintain that cadence to use your energy most efficiently, allowing you to ride faster for longer.
As you get fitter and more proficient you will find it much easier to achieve and maintain this seemingly high cadence for longer. Select your gears to suit your cadence, not the other way round. Even with advances in modern gear design, gears do not like changing under very large pedaling pressures at low cadences.
So when changing gear, especially uphill, ease off the pedaling pressure just a little to help the chain move across the sprockets or from one chainwheel to the next. This does require some anticipation on steep hills. Front gear changers can be particularly reluctant to move the chain to the smaller chainwheel so select your chainwheel before your cadence drops too low (below about 60 rpm).
When approaching junctions or coming to a stop, drop down a couple of gears (onto a larger sprocket) so that you can move off comfortably with a lower gear when you need to.
Avoid using the extreme gears (big chainwheel and biggest sprocket, smallest chainwheel and smallest sprocket) as the chain may be either too taut or too slack to work efficiently or may even foul the mechanisms. Listen to your gears too. If you can hear the chain ‘tinkling’ or ‘crunching’ against other parts, you may need to tweak the shifters to help centre the mechanism, or perhaps some closer inspection and technical adjustment may be required.
When descending, especially if you are freewheeling, shift the chain onto the big chainwheel and a medium cog, to keep the chain tight and prevent it from bouncing off. This will also be a more appropriate gear for when you need to start pedaling again.
With so many gears to use, you can fine-tune your cadence to within about +/-5 rpm of your optimum at all times. This is particularly useful when you are climbing or trying hard (such as when racing). Always position your gears accordingly.
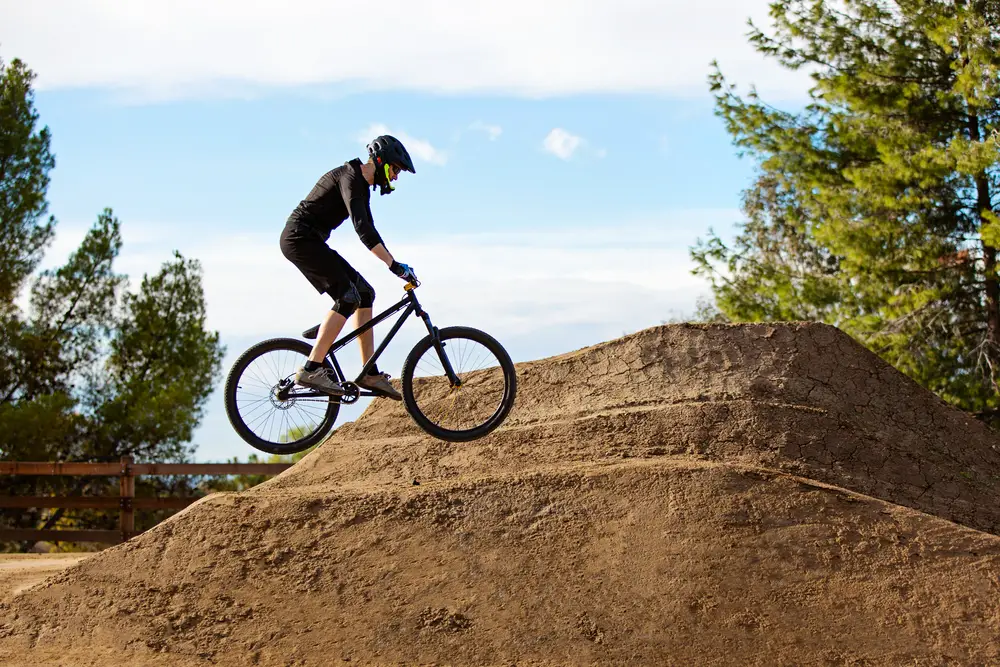
How To Take Berms Mountain Biking
Berms are tricky to master. You should never brake in turns, and definitely not berms. It’s good practice to start the berm much slower than you need and get into the habit of not braking. Then slowly increase the speed, you should feel the tires supported in the berm without losing speed. Remember to always cover the brakes with one finger in case you desperately need to brake quickly.
Berms come in all shapes and sizes, however, as a general rule, it’s often good to pick a high line on entry to reduce the amount of turning you’re doing. However, some berms are long and high speed which don’t offer much line choice, whereas other berms will have obstacles like holes, roots, and rocks (which are best avoided if possible).
If the berm has good support all around the turn, try to use all the berm making the turning curve as shallow and as smooth as possible.
As you gain more confidence and speed you will naturally start to ride higher up the berm where it’s often steeper, the centrifugal force will keep you glued to the berm and fire you out the other side.

Long, Short, & Tight Berms
Always, always focus your attention on the exit of the turn, at the turn at the beginning of the turn. Looking at the exit will help naturally put your body into the correct position, and will help prepare you for what is coming next. Your body position should depend on the type of berm.
On longer/faster berms you will only make slight alterations from the default attack position. The main thing to focus on is leaning the bike into the berm, keeping around 60-70% of your weight over the front wheel to help improve grip. Also, remember to hold your arms strong with your elbows out.
Come into the berm high, and turn your hips around the turn before you hit the turn. Try to do this in combination with leaning the bike into the turn. This combination will help put the tires on the turning edges to give better grip and also prepare you for any slides. Another tip is to push down on your heels down in the apex of the turn, this should also help drive the tires even more into the dirt providing grip when you need it the most.
Fast bike park berms are normally very hard packed and don’t offer as much grip. So it’s also worth moving your hips around the turn, but be careful how much you lean the bike. Flat berms are berms that don’t offer much or any support.
These berms you should ride similar to a flat turn – slightly leaning the bike into the turn, with 10% of your weight on the outside pedal. This should help drive the tire into the dirt for grip, and allow you to dab your inside foot should the bike start to slide.
Once you’re about to hit the apex of the turn you should be well and truly prepared/looking for what lays ahead after the berm. You should be ready to shift your weight from the over the handlebars back into the attack position, with your pedals level.
Take a look at this helpful video to see berms in action:
Video Credit: Global Mountain Bike Network
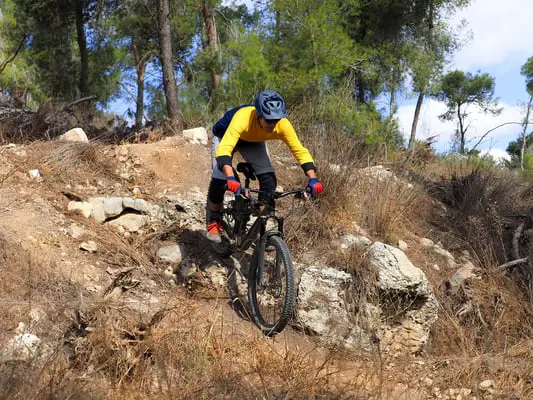
How To Ride Rock Gardens Mountain Biking
Riding rock gardens is certainly a skill that many beginner mountain bikers struggle to master. Rock gardens are bumpy and technical in nature; therefore a full suspension mountain bike will provide you with the best tool to navigate a rock garden. A full suspension bike will better handle the terrain and help to minimize the feeling of the bumps and drops. The more suspension that you have, the smoother and easier the rock garden will feel.
Loose rock can be difficult to navigate on the mountain bike because it can give you the sensation that you are out of control. With a few specific cues you can help to stay calm both mentally and physically. When riding on loose rock, keep your knees and elbows bent to add a little bit of extra suspension in your body.
A slight bend in your knees and elbows will allow you better control over the bike and will help you respond to unexpected bumps.
Keep Your Heels Down
Make sure that your heels are pushing down toward the trail. That will help to ground you. Your heels down will help to keep you balanced on the bike and keep your ankles safe. When your heels are pushed in the downward position, the ankle joint is locked.
Keep your body weight centered on the bike. Many people will try to push their body as far back as it will go. The problem with that strategy is that your front wheel no longer has any weight on it and therefore loses traction much more easily. If you are too far forward, however, you risk going over the bras if you hit an unexpected rock. Being centered over your bike will be the golden ticket.
Your tires will have the most traction on the ground when they are rolling so you want to keep your tires rolling as much as possible. If you grab the brakes too hard and lock up the wheels then you will quickly lose traction. If you don’t feather the brakes, then you will pick up speed too quickly and will find yourself completely out of control. A light touch on the brakes will give you the best control while also keeping your speed in check.
How To Go Over Logs Mountain Biking
If you need to improve your skills for going over logs, follow these steps. To execute a speed-hop right, two aspects are critical. Pay enough attention to speed and timing. You can use this method to get over bridges, rocks, a stack of logs, curbs, and more. Once you master this technique, you’ll start rolling over some pretty big obstacles easily.
Instead of worrying that logs, rocks, stumps, and whatnot will hit your chainring and damage it, master this technique. To launch into a speed-hop correctly, follow the steps below. Remember, your timing’s got to be super precise. And you should be moving fast enough, but not too fast.
How fast do you need to be going as you approach the log? Your riding speed should be comfortable enough and easy to control. Get toward the obstacle at your jogging pace.
First off, assume the correct position — the standing riding position. To get into the attack position on your mountain bike, get your bum off the saddle. And as you stand on your pedals, bend your knees and elbows.
But don’t just bend your knees and elbows — keep them relaxed. The correct way to bend your elbows isn’t to have them drop by your side. Instead, keep your elbows up, out, and forward for better control while steering. In this maneuverable riding position, your elbows will transfer enough stability to the handlebars.
And how do you bend your knees correctly? Keep them apart and bent out a little as that helps improve your balance. Keeping your knees and elbows bent and relaxed turns them into a powerful suspension that absorbs your trail’s impacts. But when you’re in that position, your center of gravity shifts up and your overall stability diminishes a bit. The upside is that maneuvering a bike gets easier in the standing riding position.
Meanwhile, your hands should stay firmly on the handlebars and your weight over your bike’s center. As for pedal position, keep the pedals level.
Stand Level
If you don’t level your pedals and don’t get off the saddle, you won’t be able to complete this technique successfully. Approaching the log seated and with the cranks in a vertical position is a recipe for failure and sometimes crashing.
Chances are you’ll fly over the bar and hit your head. So, be sure to helmet up and pad up before attempting this. The idea here is to get your front wheel on top of the log so you can use it as a pivot point. But how do you pick up the front wheel?
First off, transfer your weight backward until you have it somewhere behind the axle of the rear wheel. As you’re shifting your weight, pull the handlebars chest-ward using your arms as suspension. Your bike’s suspension should also help you suck up the handlebars toward your chest. And as your front wheel comes down and lands on the top of the log, shift your weight over the handlebars.
Lift the Rear Wheel
Use your legs as a suspension to suck your rear wheel up into your body and over the log. Lift up your heels and bend your knees while extending your arms out to the front. These three movements done quickly together should suck up the rear wheel into your body.
As the rear wheel touches the top of the log, the front wheel should have landed safely on the other side. But as soon as the rear wheel lands on the log’s top, start shifting your weight backward. Failure to transfer your weight backward a bit can have you flying over the bars…and I bet you don’t want to hit your head or break your wrist bones or arms.
Ride Smoothly
With your arms still extended, look ahead and unweight the handlebars, Why unweight the handlebars? You do that to limit compression. Getting some of the pressure off the bars also fosters a smooth rollout of your bike’s front wheel over the log.
Honestly, though, speed-hop isn’t easy. You’ll have to try as many times as you’ll need to get it down. Be careful as you approach the log at speed, though. It’s easy to land on your chainring instead of the wheel.
If your chainring digs into the log, the resulting impact will likely stop you. And when you stop abruptly, chances are you’ll be sent out in an endo.
The trick is to start hopping moments before the front wheel touches the log. The faster the speed, the sooner you should start lifting the front wheel. Shifting your weight backward and leveraging your suspension’s rebound should easily get you over the log. By the way, it’s OK to clear the log with the rear wheel. The rear wheel doesn’t need to touch the obstacle, but there’s nothing wrong if it does.
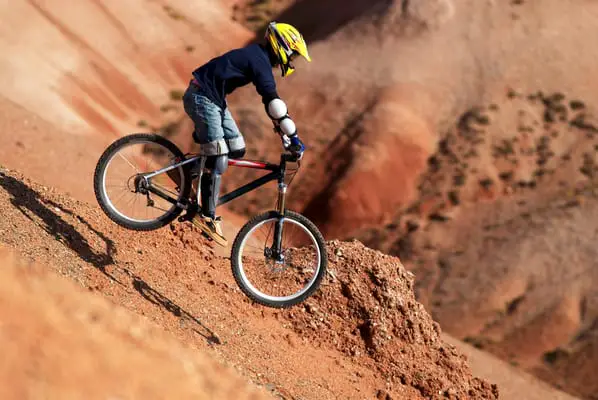
What Is Rolling In Mountain Biking?
A short but steep roll-down can be an intimidating thing—even for the moderately experienced rider. But as with most things in mountain biking, employing the correct skills will see you through unscathed. If you want to play it safe, scope out the drop beforehand. Hop off the bike and roll the wheels down the drop. Check to see if the chainrings will hit the ground and ensure that there’s nothing to suddenly catch your wheel at the base of the drop.
Check those boxes if you wish or just proceed as follows if you’re confident and riding a trail that’s within your comfort zone. First up, you should be following trail-riding rule #1; you should be looking well ahead. As you see the obstacle, assume the attack position. That means you get off the saddle with your pedals level and your arms and knees bent.
Bend your elbows out – not down – so they stick out like chicken wings to the sides. While it’s easier said than done, you need to relax. Grip the bars lightly and keep your arms loose and pliable—they are your suspension and you don’t want to leave it locked out.
You’re now fully committed. Hesitating or hitting the brakes at this point will be worse than just riding it out, so don’t panic and just roll with it. By all means cover your brakes, feather them gently if you need to control your speed but don’t slam them on. You should approach the roll-down at a brisk walking pace; fast enough to have balance but not too fast or you’ll slam into the bottom of the drop with too much momentum and may get pitched forward.
Just as you approach the crest, bend your arms even more, pulling your torso forward and over the bars. You may feel like getting your weight back at this point—resist this urge. As much as moving forward seems counter intuitive, it readies you for the following step.
As the front wheel starts to go down the drop, extend your arms and allow the bike to roll away from your body. Your arms will straighten as the bike speeds up and the saddle will need to slip between your legs—make sure you don’t snag your shorts and get stuck in front of the seat or you’ll be in trouble.
When done properly, the bike will accelerate momentarily but your body won’t pick up speed as rapidly. This is where physics comes into play; you may weigh 70 or 80kg but the bike is only 13kg. When your body gains speed, it’s much harder to slow down than the bike.
If you’ve already got your weight back and arms outstretched in step two, you’ll accelerate at the same rate as the bike once you hit the slope. By going from a forward body position at the top, you’re allowing the bike to speed up while your torso maintains a more consistent pace.
It’s not easy, but repeating this process enough will get you where you need to be.
How To Ride Rock Rolls In Mountain Biking
No matter your MTB level, rock rolls can be intimidating.
Your approach to a steep rock face is one of the keys to success. It may go against your instincts but it’s best to have a bit of momentum on your side—easier said than done but a level of commitment is required if you’re going to succeed. The bigger the up-slope, the more momentum you’ll want to have. Smaller roll-ups may be approached at a fast jogging pace, bigger ones at running speed.
You should be standing on the pedals with your arms relaxed and elbows bent— commonly referred to as the attack position. Pick your line at this point. In most cases it’s best to approach at 90-degrees to the upward slope. Taking a diagonal line may lessen the gradient but you’re more likely to lose traction and slide sideways. This is the point that many will be fearful of—impacting the step.
Unless you’re faced with a sizable vertical or overhung rock face, there’s no need to lift the front wheel. It doesn’t take too much – small rock at the base for example – to bump transition your front wheel upwards and onto the rock face. So don’t direct your energy into attempting to lift the front wheel—this can actually be counterproductive. Instead, let your relaxed upper body and arms absorb the bump.
Allow the bars to come up towards you as suck up the initial impact; you’ll maintain more of your momentum for the following stage and be less likely to get bumped off-line. So you’ve sucked up the front wheel impact bending your arms. As a result your torso has shifted forwards. This is perfect as you need to have your weight forward on the bike at this stage.
If you still had your weight back, there’d be no pressure on the front end and you’d either send the bike skyward or lose directional control. Standing with your weight forwards serves the dual role of unweighting the back wheel. Doing so will allow that wheel to make the transition onto the upslope with minimal energy loss—it’s a win-win move.
By this stage you’ve probably burnt off all of your stored momentum and will need to get some power down through the drivetrain. Last thing you want is to stall at this point and pull some awkward rearward acrobatic move off the top. As you begin to pedal, transfer your weight rearwards to drive the tyre into the ground and maximise traction.
Pulling up on the bars while driving hard through your pedals will assist and once the rear wheel is fully clear, you can resume a seated position and ride merrily off. As with any skill, start on smaller, less intimidating rock roll-ups. Where possible, look for obstacles with an easy approach and exit; this minimises distraction and lets you focus on the one specific skill.
How Do You Ride Loose Rocks In Mountain Biking?
Loose rocks are usually a hard skill to improve upon because people intimidate themselves when anticipating sliding. To ride over loose rocks, approach in your neutral position, arms and legs flexed and looking forwards. Pop your front wheel on to the first rock with a small manual. Compress your fork, then push the bike forward to unweight the front, then the rear by easing up on the pedals.
Hold the line you’ve chosen and relax so the bike can move underneath you. Focus on keeping your weight over the bottom bracket. You may have to unweight the front and rear wheels while you’re on top. Allow the bike to pitch away from you by keeping your weight over the bottom bracket and letting your arms extend, meaning you can maintain your neutral position on the downward-sloping rocks.
Manual to get your front wheel up then drive your hips upwards by standing tall, pushing down with your feet and pulling on the bar to get your body as high as you can – the bike will follow. You can use a sloped rock for extra height. Push the bar forward to level the bike out and stay relaxed while you’re in the air. Your aim is to land smoothly, so when approaching you should have judged your speed and pop to make sure you clear any square edges or rough rocks.
Steep rock slabs and roll-ins are common on many red trails. They’re generally found on slower, more technical trails rather than fast flowing ones, and most of the time there’ll be an option to duck round them – a lot of riders fear going over the handlebar, especially on big drops.
Controlling your speed and adjusting your body position correctly will keep you safe and make the transition from flat to steep smooth and balanced, meaning you’ll be able to maintain control.
Momentum can help if you become unbalanced, but we recommend starting at a slow pace so you can feel your balance on the bike before progressing to bigger rock slabs.
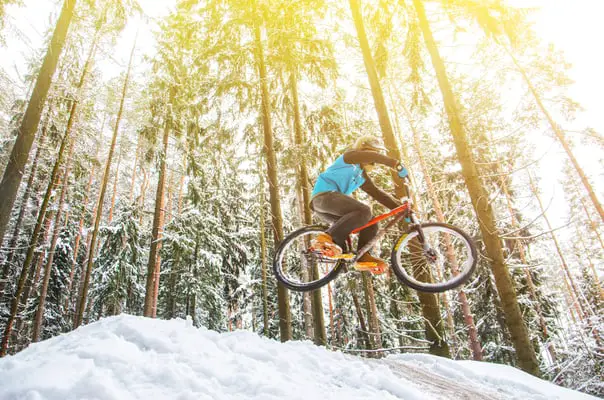
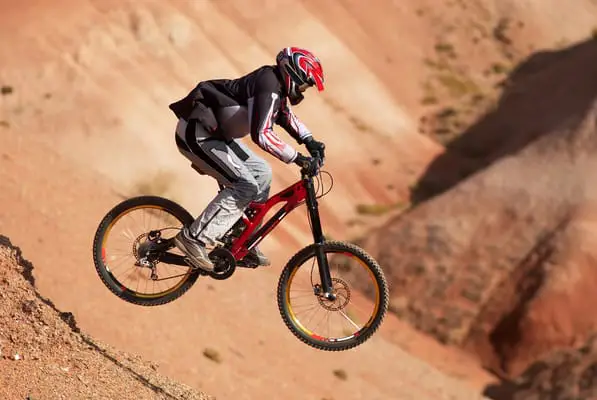
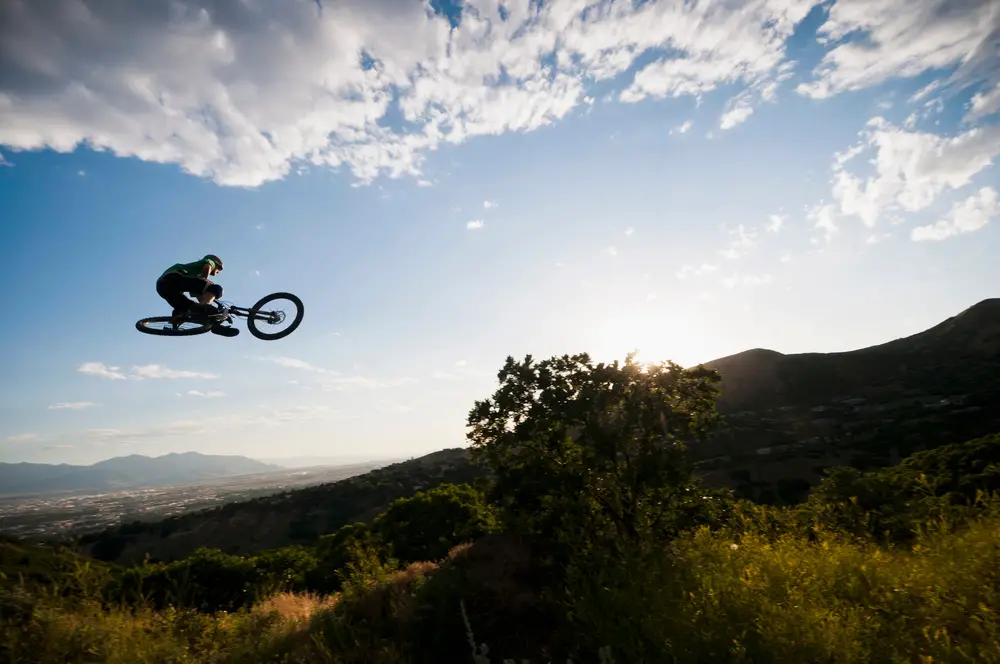
How To Do Jumps Mountain Biking
If you can jump consistently and with control, then getting your wheels off the ground is one of the best feelings in mountain biking. The feeling of floating above the trail as if you have all the time in the world becomes addictive, and as well as being fun, it also opens up a whole world of possibility when it comes to linking features together in normal riding.
If you can choose where you go heavy and light on a jump, then you can apply that same strategy to textured trails and technical obstacles. This in turn means that you can generate traction and control where you recognise certain shapes, and enjoy that floaty feeling over the same features that used to cause you all the problems. From the outside it looks like a jump should be exhilarating and exciting.
Like it should all be explosive and fire you up into the air. In reality though if you’re jumping correctly then it’s because you are confident and smooth. This comes from making slow movements and driving your weight back into the entire feature to cause consistent pressure and drive. Once you leave the ground you’re locked into something so still and predictable that it often takes riders by surprise as they feel like they should be doing more.
The effort involved in jumps should be on the ground, and last a long time. Subsequently the air time should feel like you’re floating and that you are locked into all that stability on the shape of the takeoff. The timing of a rider’s push is the most common thing we have to correct when running sessions. The vast majority of riders push too early in a jump and control the steeper ‘lip’ by backing away from that pressure.
While this will allow them to stay low and control the pop, it comes with a few of its own problems. As you back away from the push your rear wheel can sometimes clip the lip as it rolls past, flicking you forwards and sending you over the bars. Once you’ve felt this the temptation will be to back away more as you’ll be able to absorb more of the kick and stay in control.
If you jump this way then you’ll feel like you need more speed to clear a jump and be exposing yourself to more risk as jumps get bigger. What you should be doing is actually keeping the push with your legs going longer. Staying heavy on the jump will mean that you can flatten out the lip with your body weight and use the pop to send you upwards evenly. Pushing into a jump is more about balancing the extra weight you feel as you change direction.
Tips For Mountain Biking Uphill
Good climbing technique is often a mental game with MTB. If you look up and see a long climb ahead, often the best thing to do is to break it down into manageable sections. Sometimes you have to push through some of the burning legs feeling, and only focus on the tree up ahead near the big boulder. When you are almost there, then you switch your focus to the gully further up, etc.
Breaking the climb into pieces makes it much more manageable mentally, instead of the whole climbing being one massive monster that you cannot conquer. Getting off your seat is sometimes necessary for a short burst of speed, but caution. Use this technique very sparingly, because it will fatigue you very quickly. Staying seated is much more efficient, since you don’t have to support your body weight.
If the climb is really steep and you feel the front wheel wanting to lift, shift your sitting position farther forward on the horn of your seat and lean a bit more forward. A higher cadence on a lower gear is more efficient over the long haul than a higher gear with a cadence that is too low. Trying to power your way through a taller gear might seem faster, but it will drain your energy reserves more quickly.
When you maintain a higher cadence and stay in the aerobic zone, your muscles can clear out the lactic acid to prevent a buildup. But if you push a really high gear at a slower cadence, chances are you’ll go anaerobic and your muscles won’t be able to clear out that lactic acid. Consequently, you’ll burn out too soon. Try to not slow down too much for turns and obstacles during the climb.
Repeatedly getting yourself back up to speed uses up a lot of energy. This also means picking up speed before you hit the steep sections, so that you can carry more momentum into them. If you have an adjustable fork and shock on your bike and the trail has plenty of climbs, dial down the fork compression and set the shock to climb mode.
As long as there aren’t a bunch of technical sections coming up on the trail where my suspension is going to get a real work-out, I usually stiffen up my fork and shock. This makes the ride harsher but it also makes climbing more efficient. A soft, squishy ride is great for maintaining control on the bumpy stuff and on downhills, but is generally not as efficient for climbing.
How Do I Protect My Balls When Mountain Biking?
You can try a number of things to prevent your testicles from suffering too much with MTB. You could wear padded bicycle shorts to protect your nuts. You could try using chamois and if necessary, you could use lubricants with them.
You should check on your seat height regarding if it’s at the right height or not. If your seat is not at the right height, it could put extra pressure on your testicles. You should practice standing up from your seat often to allow smooth blood flow within your testicles.
Using a good seat is the utmost necessity to protect your testicles. So, now you might be wondering what could be a good seat. We have reviewed a number of bike seats for men that will make your rides more comfortable.
Noseless bike seats are designed with male cyclists in mind and often solve the problem of excessive pressure on the delicate male parts. It may take a couple of tries to find a seat model that fits you best and you will have to pay extra for the comfort.
If you are looking for a quick and cheap solution, a gel bike seat cover will help you to add more comfort to your bike rides.
How To Get Faster At Mountain Biking
Climbing, descending, hopping, jumping, cornering, pedaling, and shredding (a mixture of all disciplines) is what you will need to master and build up to on the road to becoming an experienced and competitive MTB racer.
A great way to learn these disciplines is to advance to riding in dedicated bike parks. Bike parks are fed by gravity, which basically means that you can expect to practice and hopefully master all of the above disciplines I mentioned above, which include a ton of jumping and cornering at high speeds and across very challenging terrain.
Bike parks are also coded to indicate the advancement process beginners to professionals need to master to become true MTB riders.
Also, there is a lot to be said for research and studying when it comes to advancing through MTB in terms of your confidence. You can watch actual rides and races on YouTube, follow MTB athletes on social media, and continuously train your brain to learn these techniques when you need a reference point if you just aren’t showing progress out on the trails.
MTB requires constant practice and experience to learn, and if you follow some of these tips, you will be well on your way to mastering mountain biking.
When it comes to riding a bike, exercise can be thought of as just another byproduct of physical exertion. But if you do set out to get physically fitter, then mountain biking can be the most perfect type of exercise.
With that in mind, mountain bikes are a great tool to boost your physical fitness. You can use a mountain bike if you are just starting out in a quest to get leaner and faster within a few short weeks, and let’s face it, riding a bike in the open outdoors can be way more satisfying than being stuck in a gym, and you can still listen to your favorite songs as you give your body a challenging workout.
Mountain biking can even be appealing on days when you are feeling lazy overall. Just basic strides and strolls with your mountain bike can burn calories and awaken your muscles, specifically in a low-impact intensity.
If you are looking to lose weight, a lean diet is important, but 45 minutes to one hour of MTB per day can fulfill all of your exercise requirements.
How To Improve Uphill Mountain Biking
If you’re still having issues making it up the climbs, focus on getting yourself into better cardio shape. You may just need to up your cardiovascular activities. I know that usually at the end of the season, I can do the same climbs much easier than I did at the beginning of the season.
I know that many of us (myself included) can’t ride as often as we’d like.
In order to keep my aerobic fitness up, I now also do brisk walks of 2-3 miles around 3 times per week. During these brisk walks, I mix in 1-minute slow jogs just to get my heart rate up (just like circuit training on a treadmill). These walks are just another really awesome way to improve my cardio. I just started doing this a few months ago, and it has made a huge difference for my riding.
I always pre-hydrate myself before I even start riding. I then continue to hydrate during the ride. If you do not properly hydrate during MTB, it will be nearly impossible to complete the extreme exertion it takes to do uphill mountain biking effectively. This also means not to wait until you are thirsty to get your next drink during the ride. If you do that, you will never be able to keep up with your hydration needs.
How To Get Better At Downhill Mountain Biking
It is natural to want to grow faster at downhill MTB racing, but it can also be a scary proposition, and rightfully so.
Downhill mountain biking, in many ways, can also be referred to as the very first form of mountain biking, certainly MTB racing. Back in the early 1970s, the very first off-road bikes were first raced in Marin County, California. Although downhill racing has changed a lot over the years, the very first concept is still basically the same: top of the mountain to the bottom as fast as possible.
Extreme downhill mountain biking is often likened to downhill skiing in how the idea is the same. The riders smash open the start gate and then race down the terrain as fast as possible across rocky terrain that is almost unrideable if a fast speed is not used. The only way to get faster is to practice, and it must be said, to be willing to crash and burn. It is important to know why this is the norm for downhill racers.
It is because the rider that crosses the finish line in the fastest time is the winner. The tracks selected can be as long as 6 minutes with the 600-meter drop to the finish, and high-speed sections with large jumps that require tried and true experience and practice to execute perfectly. The only way to get faster to achieve a win is to throw caution to the wind while still maintaining what the normal safety threshold for downhill should be.
Downhill races typically take place in the summer, and riders are typically taken to the top of the terrain by a ski lift. Furthermore, downhill bikes have around 200 millimeters of suspension to soak up the punishing terrain, and large disc brakes will help disperse the heat that builds up, and the tires are built super tough with thick sidewalls and sticky rubber.
Wide and high handlebars along with a short stem will help get the weight behind the bike for downhill riding. So, to get faster, you need to ensure your bike meets the required parameters.
How To Get Fast at Downhill MTB
The pinnacle of downhill racing is the World Cup Series, which is a championship of six to eight events that take place around the world. The rider with the most points at the end of the year is awarded the World Cup title, therefore, only the fastest and best of the best can hope to compete.
Additionally, extreme downhill MTB has a yearly one-off race known as the World Championship, and in this race, the top riders are all fiercely competitive, which makes this race an exciting spectacle, both for professional MTB riders competing and for spectators.
For both of these competitions, practice is absolutely crucial, as is the case with nearly all professional sports–MTB is no different, and riders need to put in countless hours of practice year-round in preparation for these races.
Although extreme downhill MTB racing does come down to technical riding ability, the riders also need a superb level of fitness, particularly lower body fitness. Many of these top races can hit up to 2,000 watts of maximum power and regularly hit over 1,000 watts of power in just one run.
With a rider’s heart rate at near maximum capacity for the entire duration of the run, and coupled with the stamina needed to practice at maximum capacity for at least a few weeks before, downhill racers need to ensure that their bodies are 100% fit.
Downhill MTB is frightening at first, but you have to practice and accept the danger if you ever hope to get good at it.
How To Improve Mountain Biking Endurance
To improve MTB endurance, you really need to focus on your overall physical fitness to maintain the strength and balance you will need. To build endurance, it is important to try and change up the sort of riding that you do. If you normally only do one or two-hour trail center types of rides, challenge yourself to go even further.
One way to do this would be to try a cross-country ride that lasts for about 3-5 hours to see just how far you can last in this advanced type of MTB. Never give up on increasing your stamina by starting slow in the more advanced type of rides to stop feeling afraid.
Sooner or later, the advanced riding will start to feel normal–not scary, and then you can try the next challenge.
Speaking of challenges, you should never stop trying to challenge yourself. A great way to do this would be to challenge yourself to ride up short steep climbs. This can be really good for your fitness because you’re putting in a really hard, short sharp effort, but also really good for your skills by trying to get up a climb without worrying about falling.
You can also consider timing yourself. You can use a device like Strava or something similar to keep track of how long it is taking you to traverse a path or a climb. Timing yourself can help you maintain endurance when you are feeling really tired and feel like you cannot go any harder. Always follow the time to ensure you complete the task you set out to do.
You can also try and build interval sessions into a normal trail ride. Depending on how big the hill or slope is that you need to get up, you can practice interval training on short climbs to build your stamina in interval training. Consider timing the intervals in one-minute bursts in sessions of 5 intervals. The more you build up to an MTB challenge, the more experience you gain in the activity, and this translates to a lessening of fear.
It goes without saying that one of the best ways to increase your stamina with MTB is to ride often. Try to ride your mountain bike 3 to 4 times per week and do not ride until you injure yourself or need a long recovery after an intense ride. Vary your efforts across these 3 to 4 rides per week and focus on sprint intervals and maintain a good average heart rate the entire time.
Lastly, it is important to stretch before and after a hard ride. This can really help keep away any aches and pains that can occur from even low-intensity bike rides. If you regularly feel pain or aches after an activity like MTB, it will be natural for you to fear the activity again. Always stretch to alert your body that the activity is okay.
- Durable mountain bike designed for trails and neighborhood rides
- Alloy crank provides steady gearing and less maintenance
- Twist shifters with rear derailleur for quick gear changes on the trail
- All-terrain, wide knobby mountain tires sit on light and durable alloy wheels for added stability
- Quick release seat post makes for easy height adjustment
Prices pulled from the Amazon Product Advertising API on:
Product prices and availability are accurate as of the date/time indicated and are subject to change. Any price and availability information displayed on [relevant Amazon Site(s), as applicable] at the time of purchase will apply to the purchase of this product.